
Attendance is matched to the claimant’s verified account email. A participant’s preferred printed name can differ from their email address.
Before you start
Open the correct training session. Prepare attendance records with accurate emails and names. Only confirm people whose attendance you have checked.
Steps
1. Open Attendance
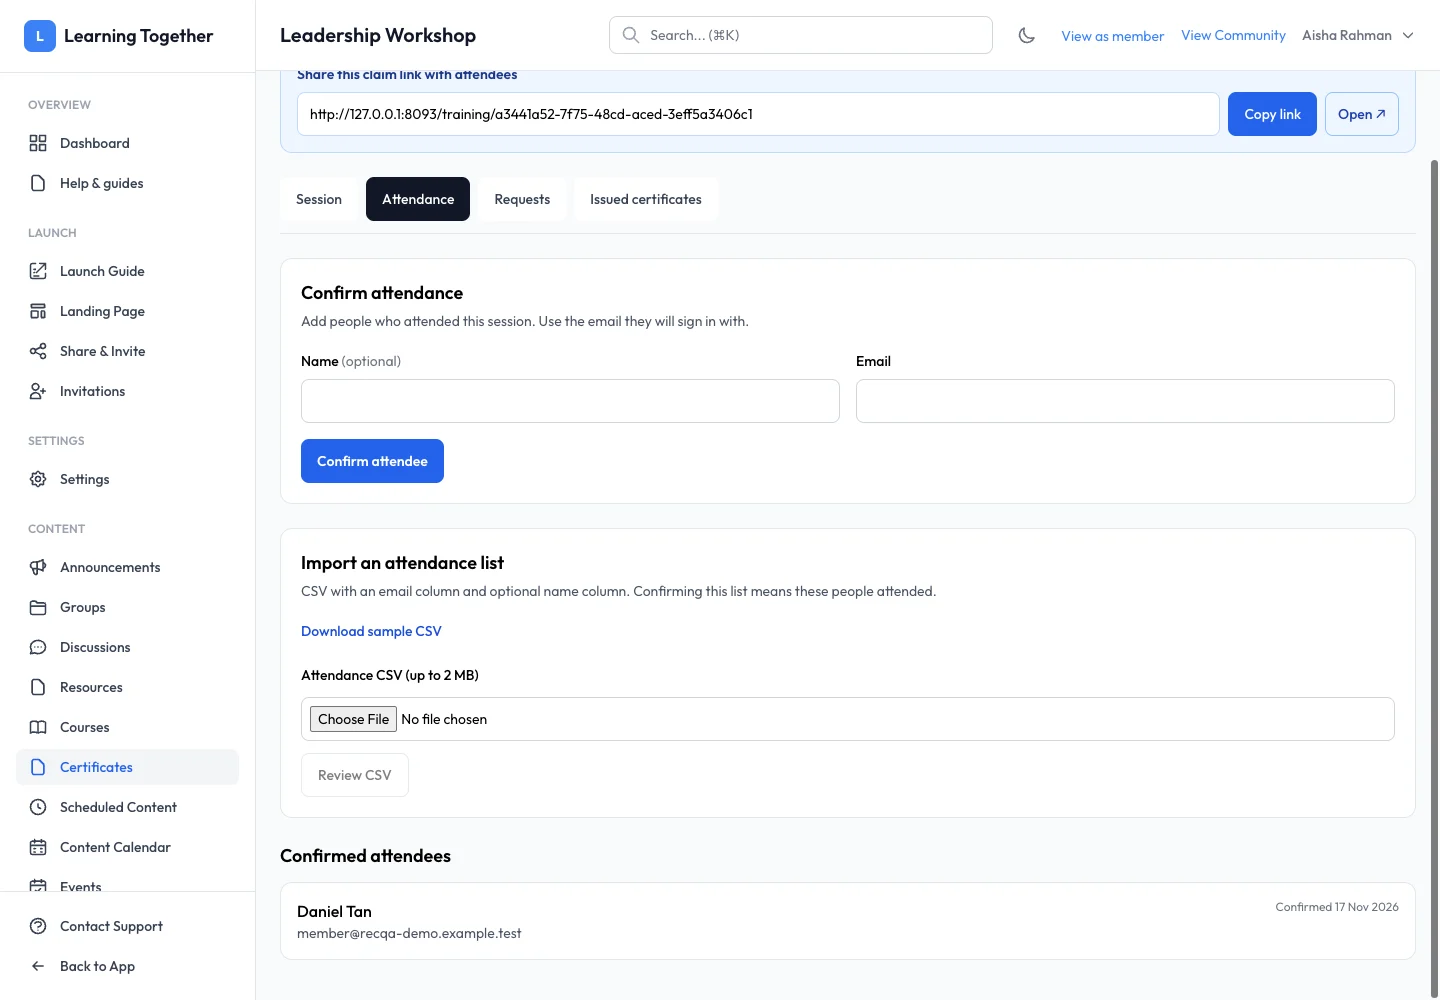
Choose Certificates, open the session and select Attendance. Use the attendance form or CSV import controls shown to add the confirmed people. Follow the displayed CSV columns and review import feedback rather than assuming every row was accepted.
2. Check the confirmed list
Search or inspect the list and compare the email spelling against your source record. Confirm attendance using the available action. A person with matching confirmed attendance can proceed without a separate manual claim review.
3. Review unmatched requests
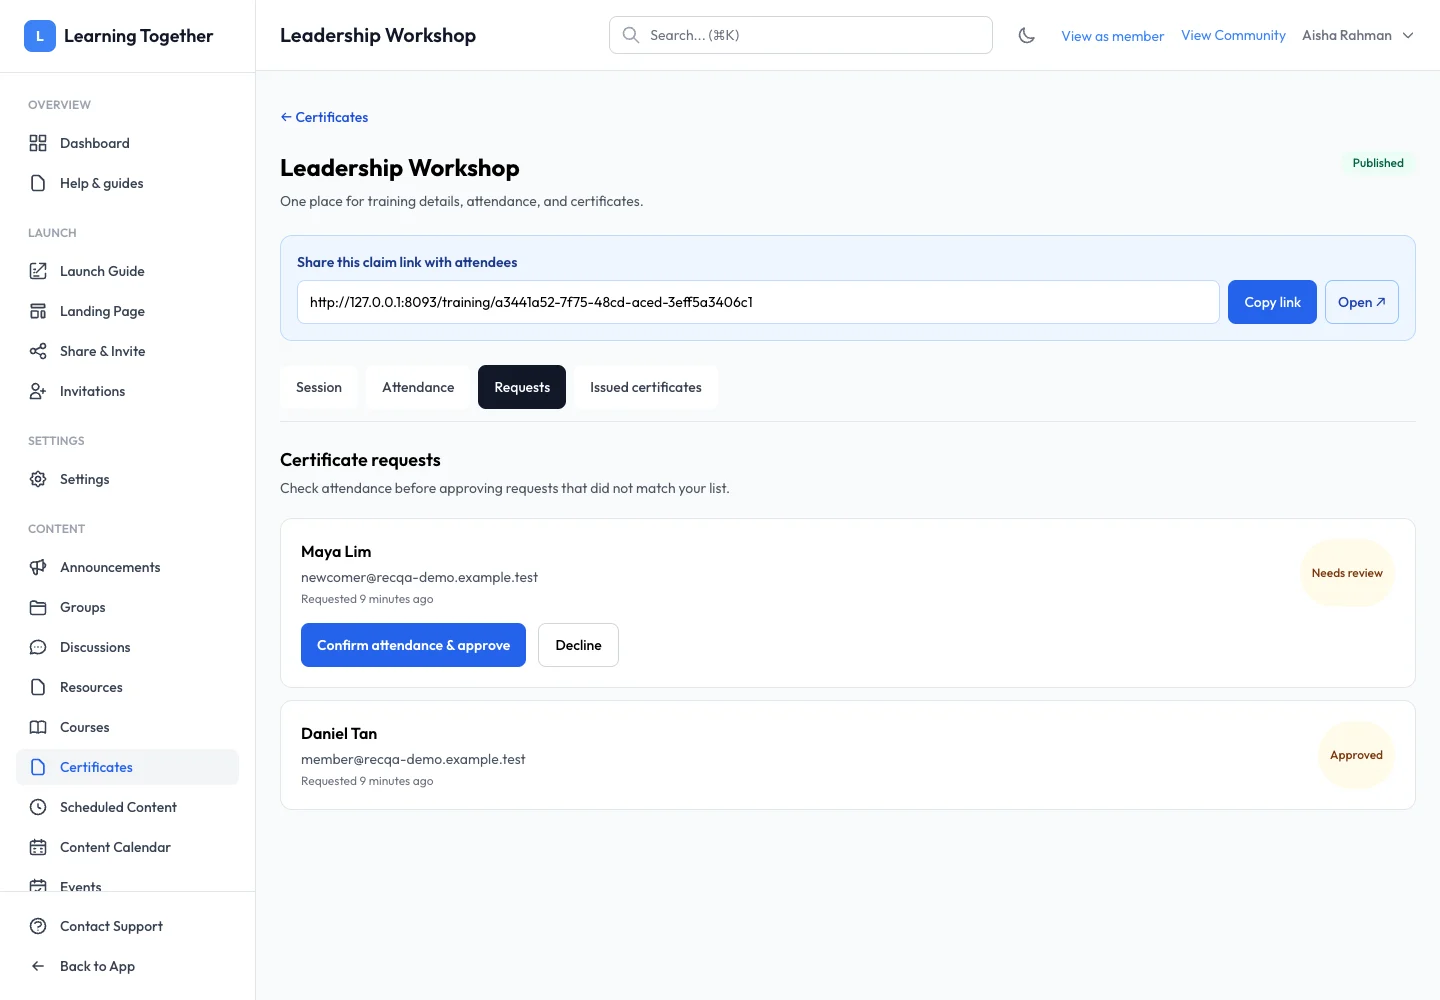
Open Requests. Read the requested certificate name and email. Check your attendance evidence before approving. Do not approve merely because the person can open the public link.
4. Approve or reject with context
Approve when you have confirmed eligibility. If rejecting, enter the required reason so the decision has a clear explanation. Approved claims proceed to certificate generation. Check Issued certificates for the result.
Expected result
Confirmed attendees receive certificates through the appropriate path, while unmatched requests have a recorded review decision.
Troubleshooting
- Known attendee waits for review: compare the exact verified account email with the attendance record.
- CSV has rejected rows: correct the reported columns or values and import again according to the screen’s feedback.
- Approved claim has no PDF yet: inspect its generation status and retry a failed generation where offered.
- Approved certificate needs changing: use the issued-certificate correction workflow rather than rejecting an already approved claim.