
A person can be a community member without having access to every group. Use the group workspace to manage that smaller membership.
Before you start
Open the correct group from community management. You need permission to manage its settings or members.
Steps
1. Update group information
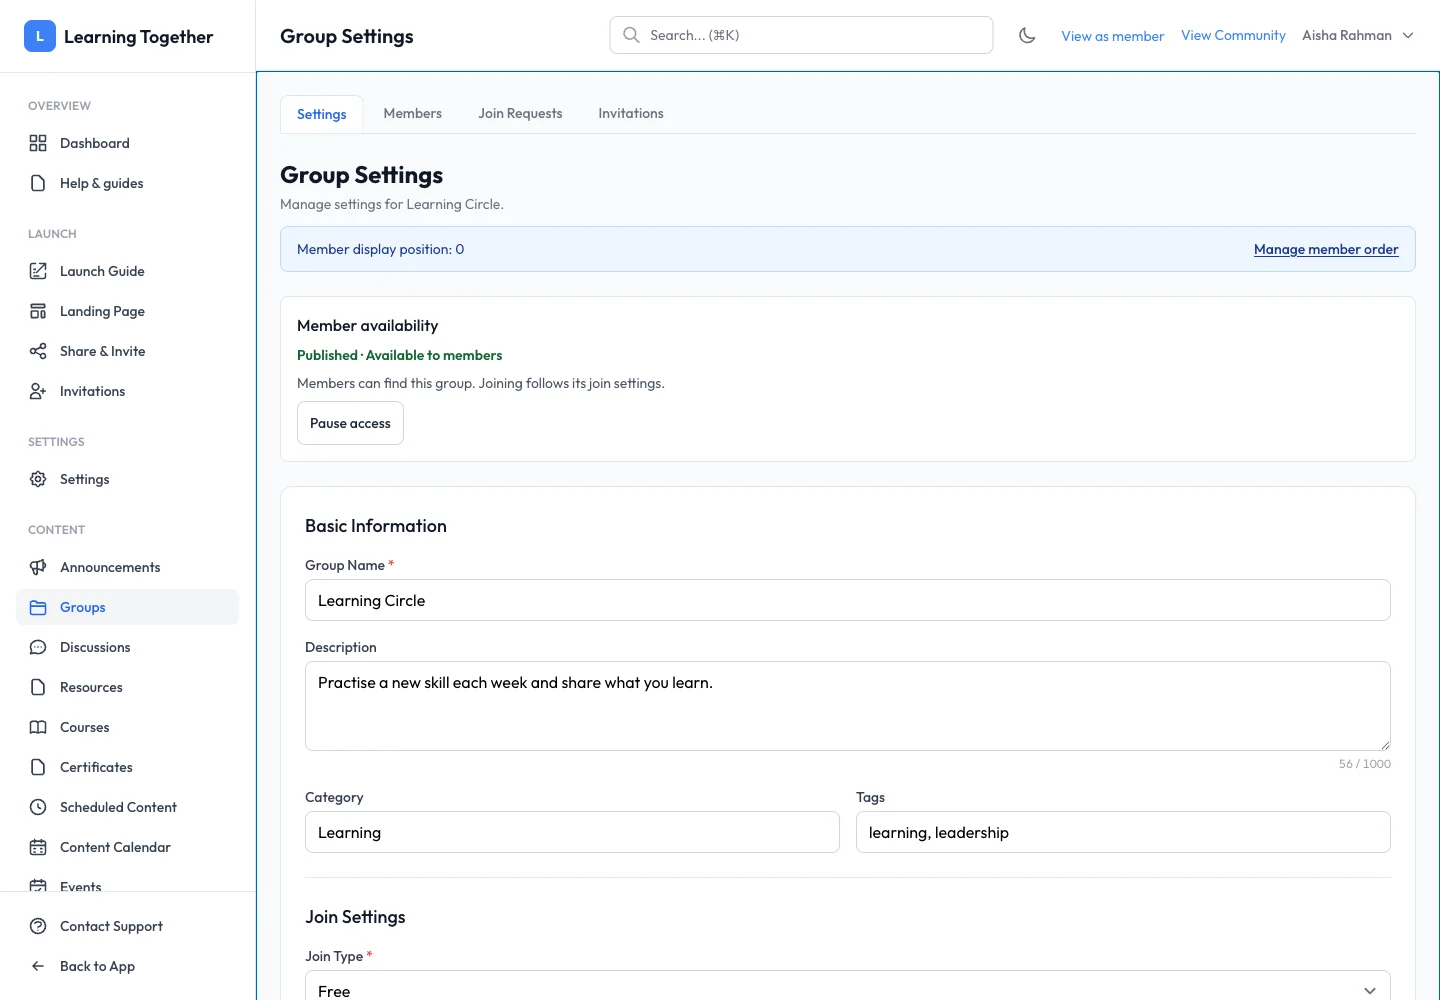
Open Settings in the group workspace. Edit its name, description, category, tags and welcome content. Review Join Type, Max Members and Require approval for new members. Select Save Changes.
2. Review members
Open Members. Find the person by name or email and inspect their status and group role. Apply only the role or access action you intend. A group role does not automatically grant community-wide management.
3. Process join requests
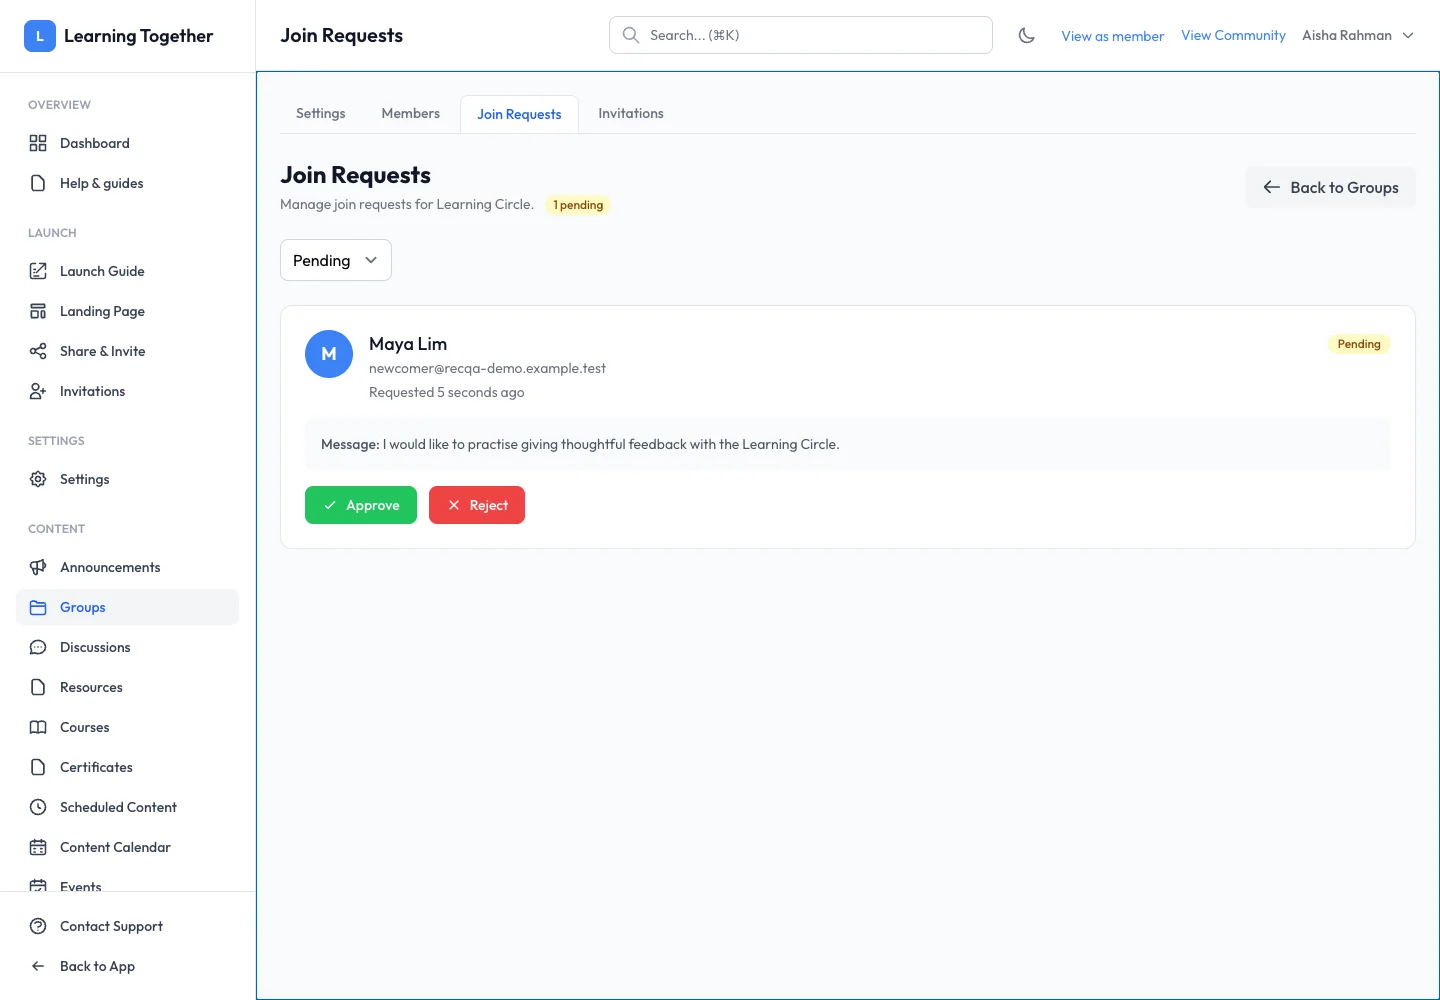
Open Join Requests. Review each pending person and approve or reject using the available controls. Recheck the member list after approval. If the community membership is still pending, resolve that access requirement too.
4. Invite to this group
Open Invitations from the group workspace or create an invitation with this group selected. Review whether payment is bypassed before sharing it.
Expected result
The group contains the intended members, with requests handled and settings saved. Community access continues to follow community-level rules.
Troubleshooting
- Approved person cannot enter: confirm active community membership and group publication.
- Group full: inspect Max Members and your plan limit.
- Wrong role changed: distinguish the group’s Members tab from the community Members page.
- Saved rules not visible: reopen the group settings and verify the Save Changes action completed.