
Groups bring related discussions, resources and courses into a smaller space. Give each group a clear purpose so members know where to participate.
Before you start
Enable Groups in community Settings and check your group allowance. Decide whether the group should be free, paid or invitation-only.
Steps
1. Create the group
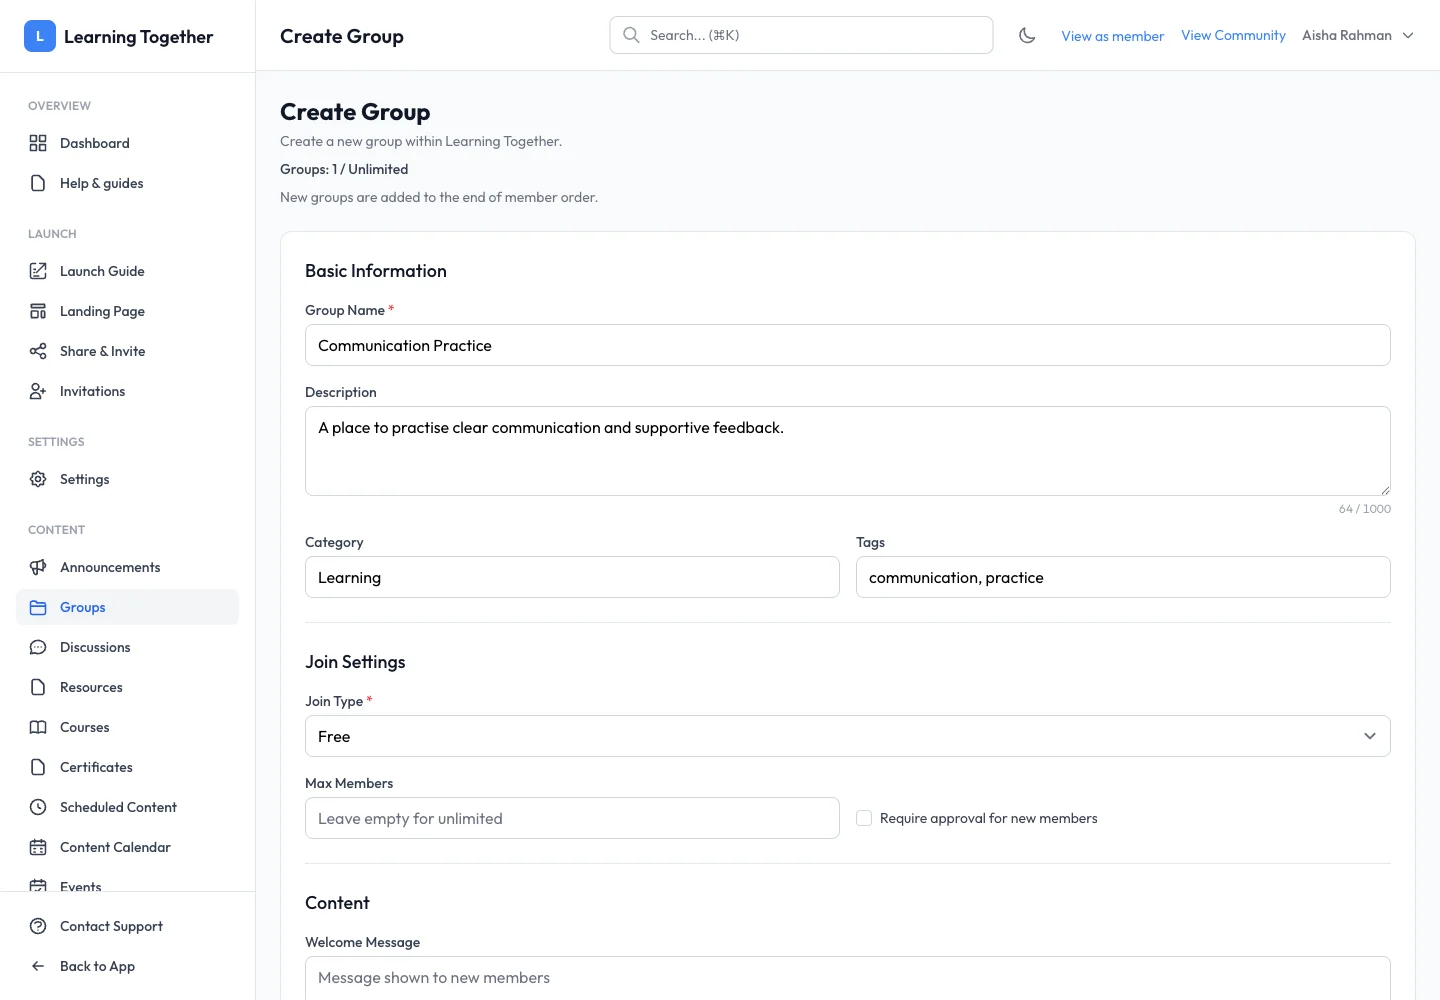
Open Groups → Create Group. Enter Group Name, Description, Category and relevant Tags. Use a name such as “Communication Practice” rather than an internal project code.
2. Choose joining rules
Set Join Type. Add price and currency if paid access is available and selected. Set Max Members if needed and decide whether new members require approval. Check these choices against your invitation plans.
3. Add welcoming content
Fill Welcome Message, Benefits, Requirements and Group Rules. Tell new members where to start and what behaviour you expect. Select Create Group.
4. Check publication and order
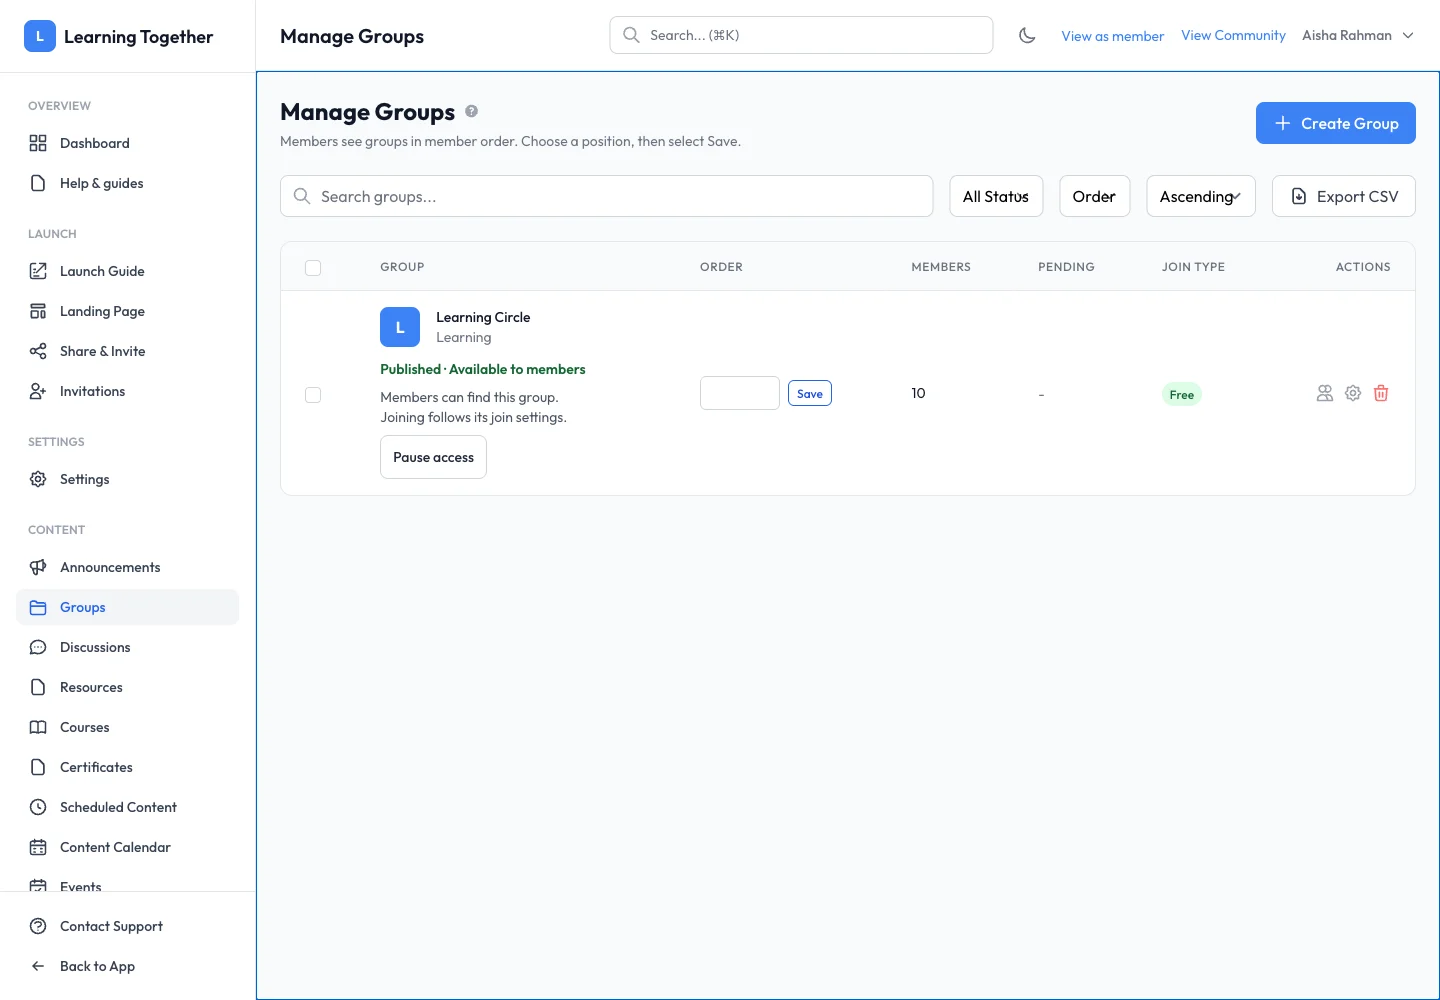
In Manage Groups, read the group’s member-availability state. Publish a draft when its content is ready. Existing published groups offer Pause access; read the confirmation before using it. Set the desired Order and choose Save for that row. New groups are added to the end of member order.
Expected result
The group appears in the intended order and becomes available to members according to its publication and joining rules.
Troubleshooting
- Group hidden: check community publication, group availability and feature settings.
- Members wait to join: review the approval requirement and Join Requests.
- Order did not change: save the row after entering its position.
- Course in wrong group: a course’s group is fixed at creation; choose carefully before creating courses.