
Community Storage measures content in communities you own. A normal member without an owned community does not see the same owner storage totals.
Before you start
Use the community owner’s account and check that its subscription permits the upload. Keep an original copy of important files outside Recqa.
Steps
1. Open Community Storage
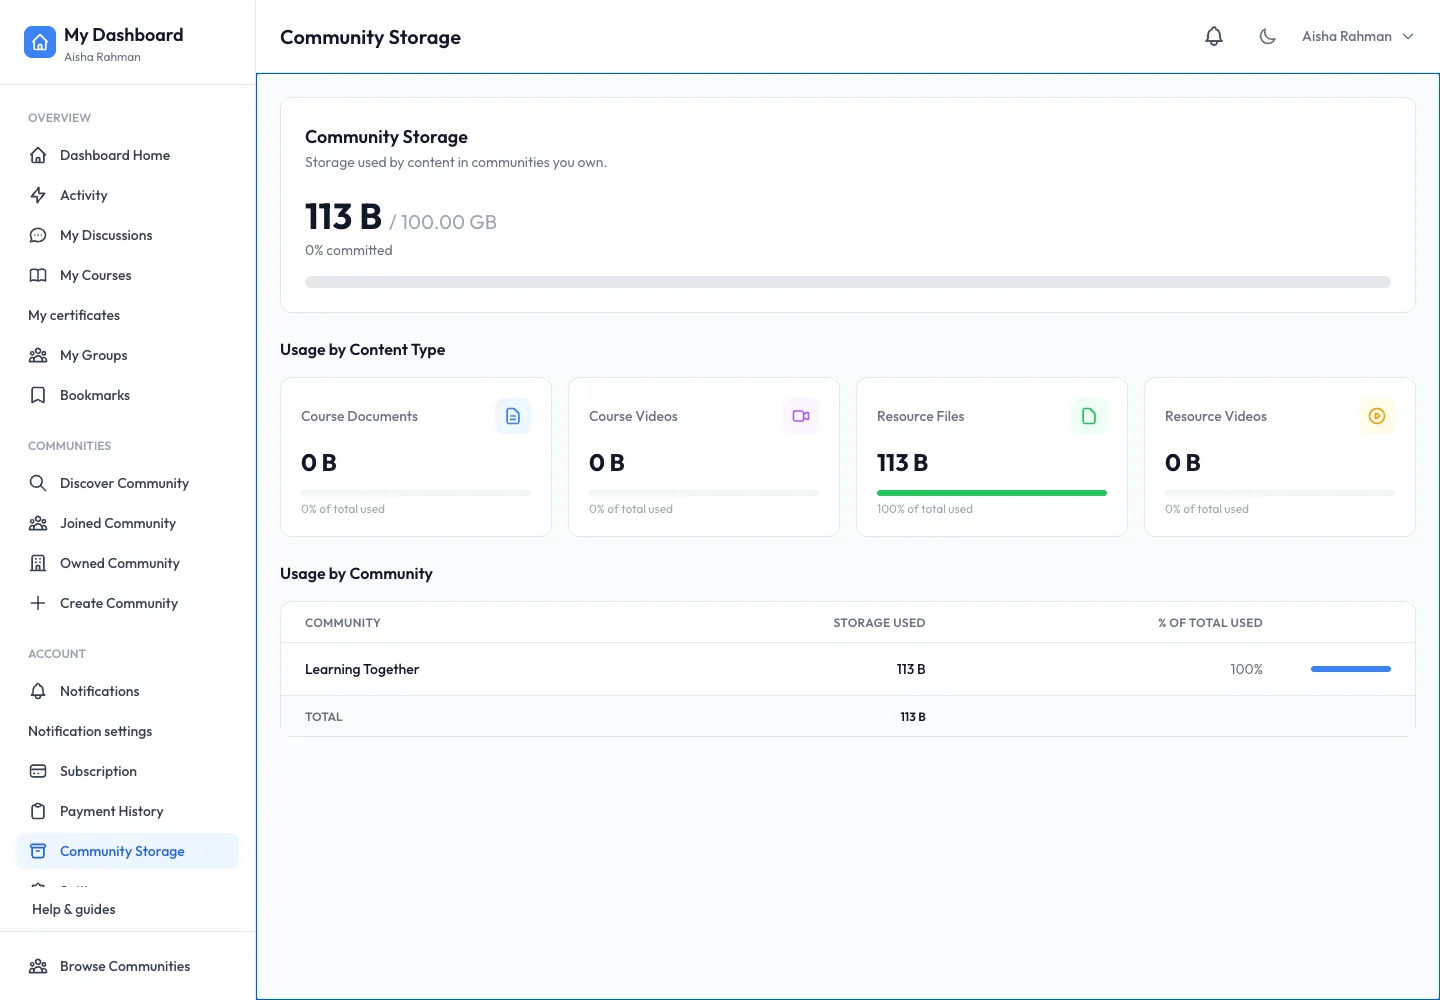
From your personal dashboard, choose Community Storage. Read the used storage and plan allowance. The page separates content types such as course documents, course videos and resource files.
2. Identify the affected community
Review Usage by Community before removing or replacing any content. A file may be part of an active lesson or resource, so open the source item and check its use first.
3. Prepare a supported file
Use the format and size limit on the specific upload form. Course documents, course audio, community logos and certificate logos have different limits. Compress or export the original file to a supported format if needed; changing the extension alone does not convert it.
4. Upload and verify
Wait for the upload to finish, then save the lesson or resource. Open the saved item as an eligible member and test the player or download. Revisit Community Storage to inspect the updated usage.
Expected result
You can identify where storage is used and verify that a supported upload is saved and usable.
Troubleshooting
- Storage quota reached: remove genuinely unused content or review subscription capacity with the owner.
- File below quota still fails: check the per-file size and type restriction as well as total storage.
- Upload finished but item is missing: save the containing form after the upload.
- Usage does not change immediately: reopen the page after processing; check whether another copy remains attached elsewhere.