A recognisable name, logo and welcome message help members know they have reached the right place. Save each settings tab after making changes.
Before you start
Open community management with settings permission. Prepare a square logo and any cover image. Write your guidelines in plain language before pasting them into the form.
Steps
1. Update General settings
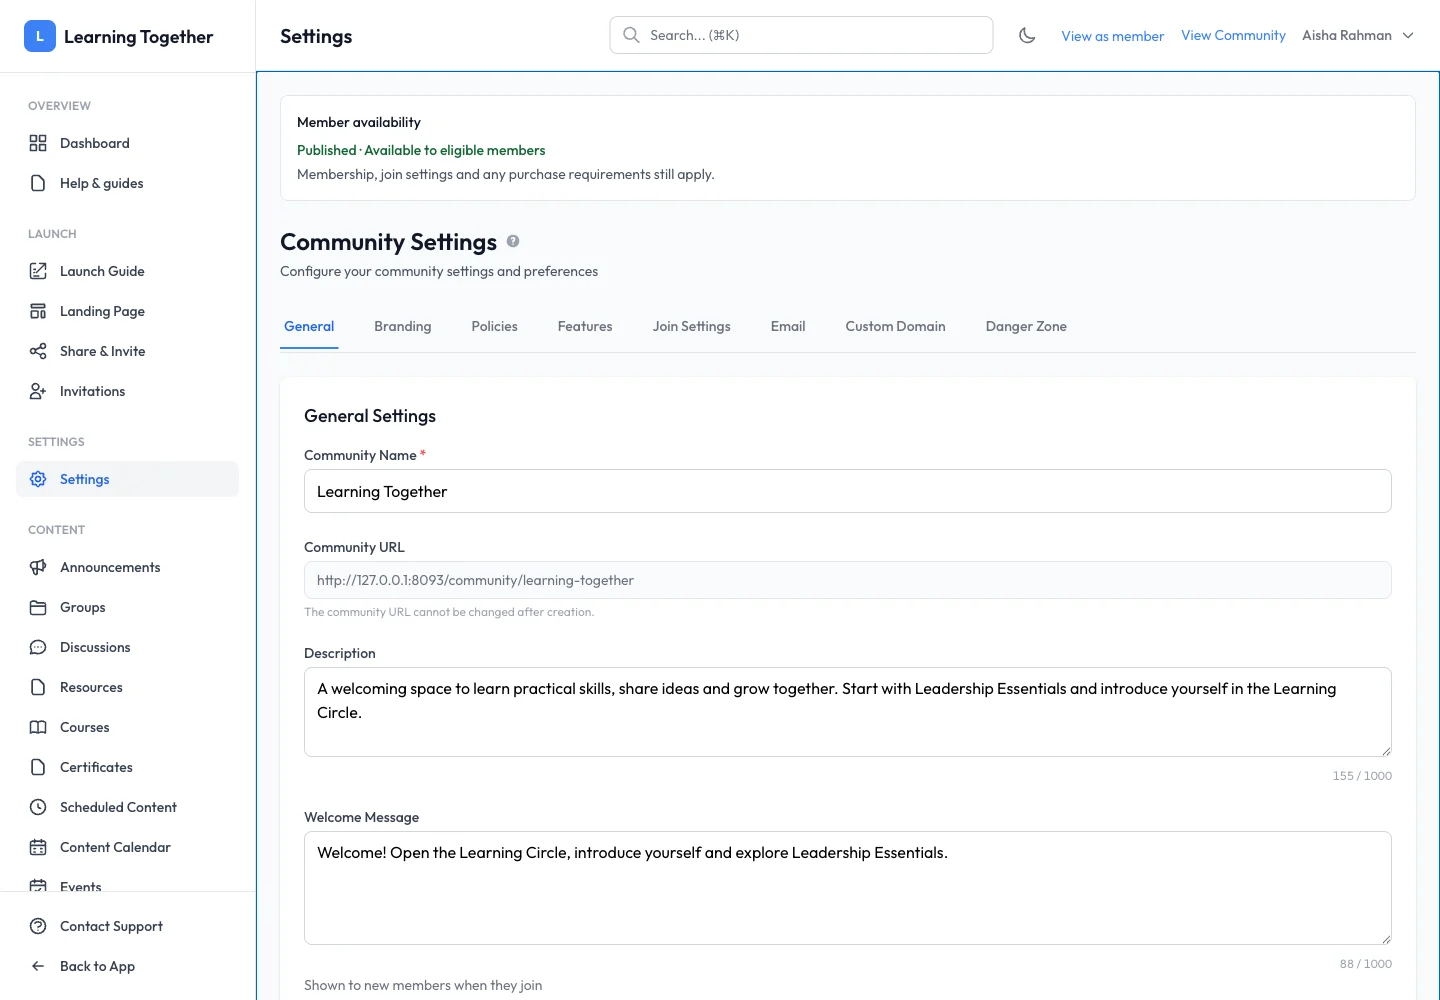
Open Settings → General. Set Community Name, Description, Welcome Message and Timezone. The community URL is shown for reference and cannot be changed here. A welcome message should tell members where to begin, for example: “Introduce yourself in Learning Circle, then open Leadership Essentials.”
2. Upload your images
Use Community Logo for a PNG, JPG, GIF or WebP up to 2 MB; the screen recommends a 1024-pixel square. Use Cover Image for the wide community cover, within the displayed 10 MB limit. Review the preview and select Save General Settings.
3. Set the main colour
Open Branding, choose Primary Color and select Save Branding. Check text and buttons against the resulting colour; very light colours can make labels hard to read.
4. Add policies
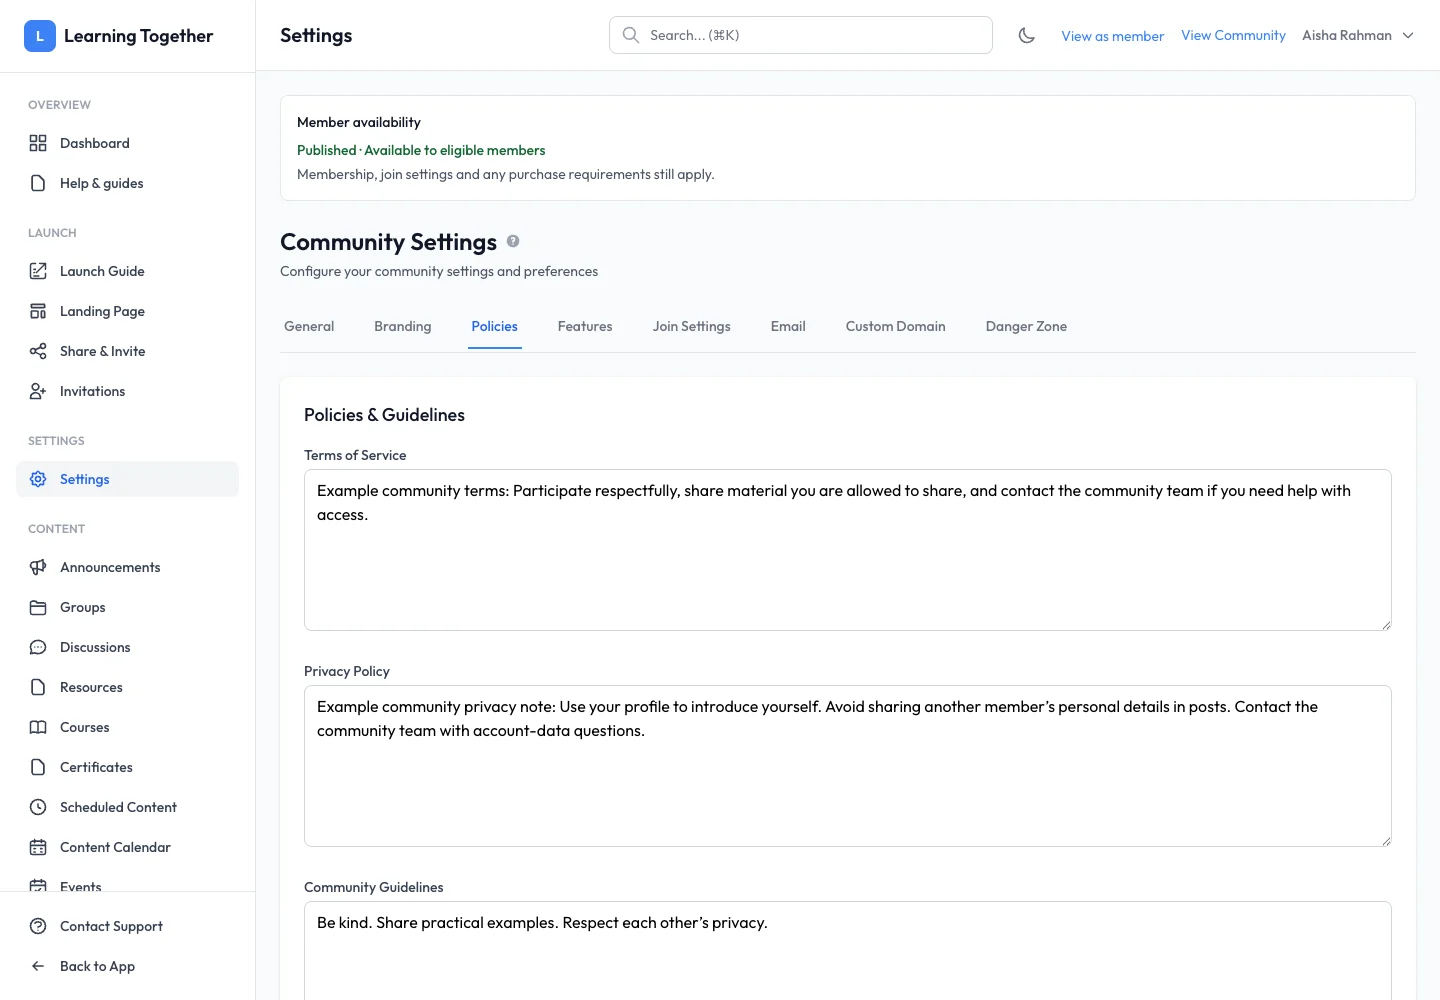
Open Policies and fill the terms, privacy and community-guideline fields appropriate for your community. Explain participation expectations, moderation and how members can contact your team. Save the tab and review the community-facing presentation.
Expected result
Reopening each tab shows your saved values. Members see a consistent community identity and a useful welcome message.
Troubleshooting
- Logo rejected: check the file type and size; renaming an unsupported file does not convert it.
- Colour makes text difficult to read: choose a darker, higher-contrast colour and preview again.
- An edit disappeared: save the current tab before moving to another.
- Scheduled content uses the wrong time: verify the community timezone before creating new schedules.