
Scheduling publishes saved content at a future time. It is separate from scheduling a live event or sending an email.
Before you start
Prepare the content and confirm the community timezone in Settings. Check the audience and all links before scheduling.
Steps
1. Choose Schedule on the content form
Open or create an announcement, resource or course. Select Schedule in its publication controls and enter a future date/time. Read the timezone shown by the form. Save the content using its create or save action.
2. Check Scheduled Content
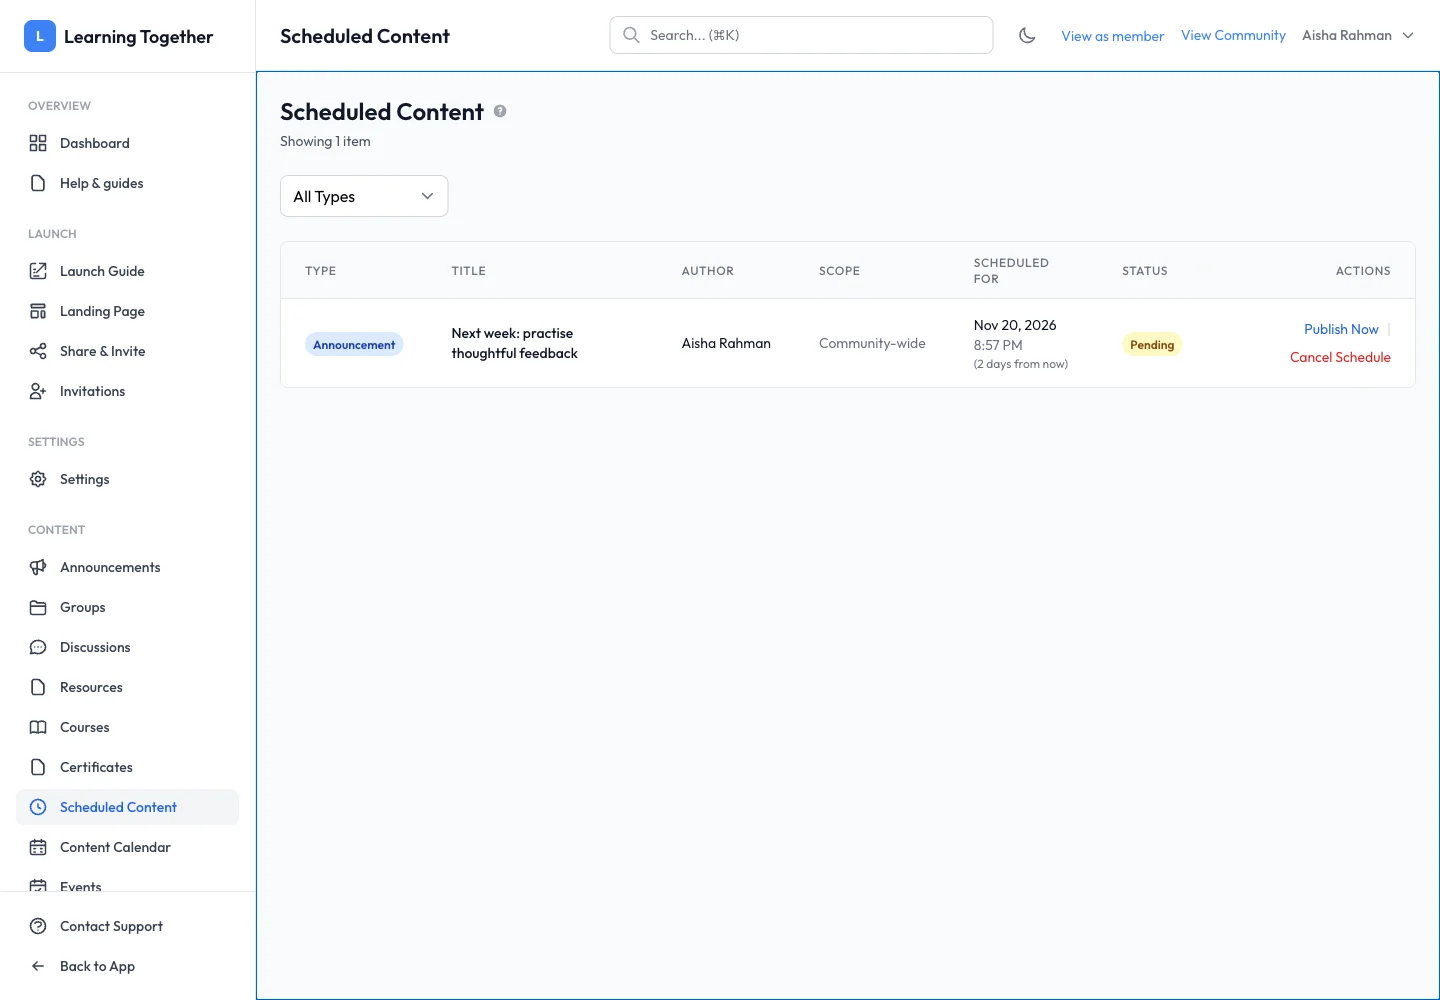
Open Scheduled Content from management. Confirm the item’s type, title, scope, scheduled time and status. Use the content-type filter to focus on announcements, resources or courses.
3. Review the calendar
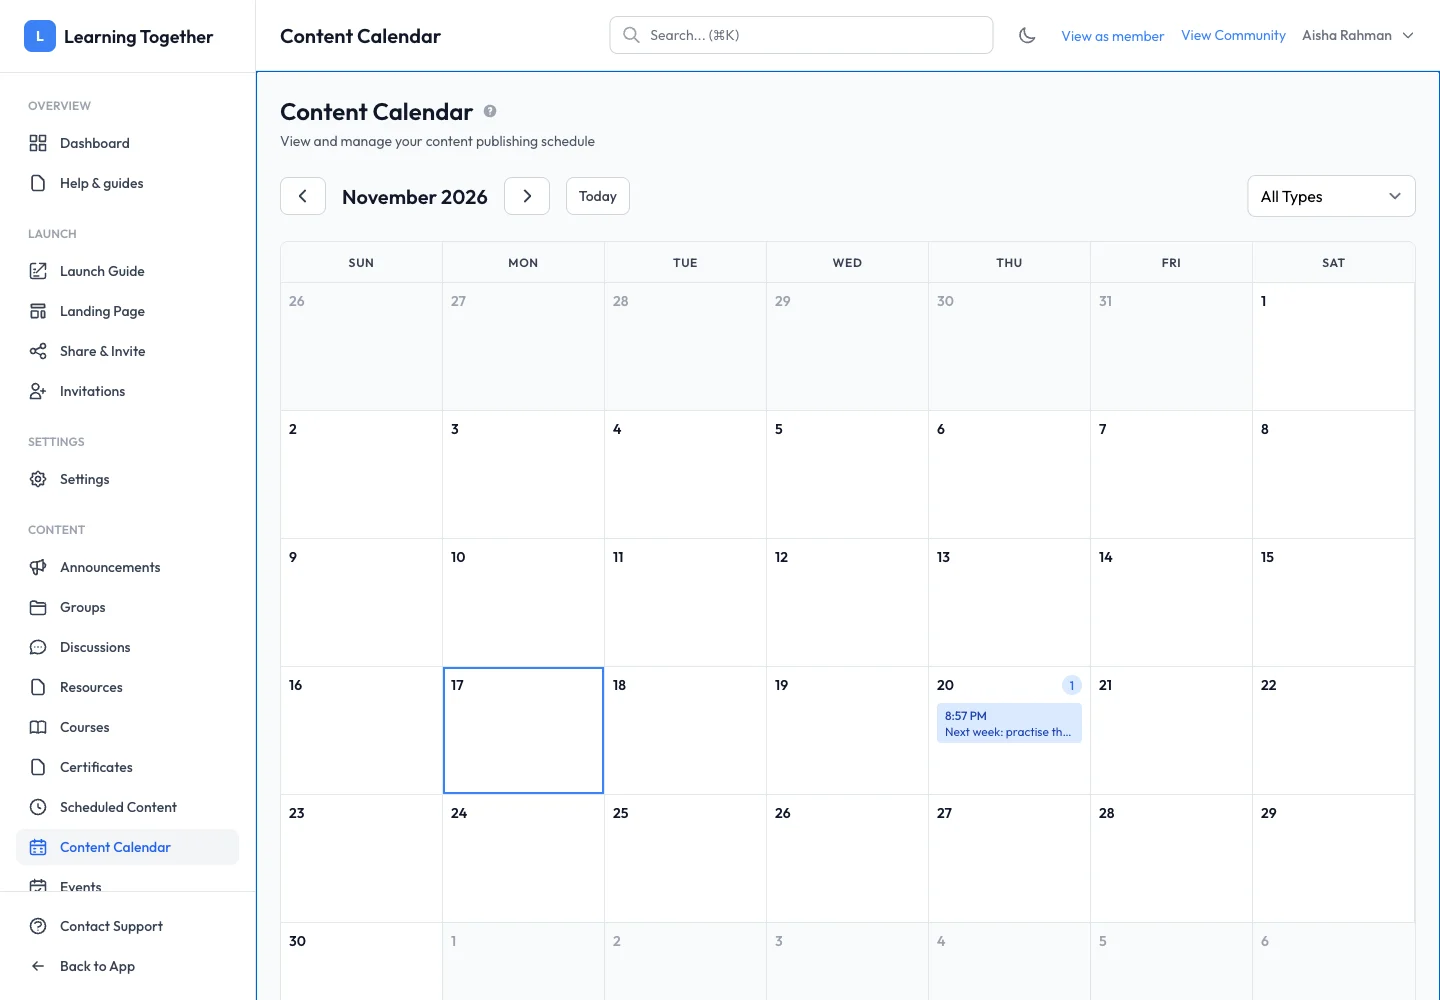
Open Content Calendar. Move between months and use Today to return to the current period. Filter by content type when planning several items. Select a scheduled item to inspect the available details or edit action.
4. Change the plan deliberately
Use Publish Now to release an item immediately only when intended. Use Cancel Schedule to remove its pending schedule, then inspect the saved content state. To reschedule, edit the item, choose a new future time and save.
Expected result
Your item appears at the correct time in the schedule and calendar, then follows its publication status when processed.
Troubleshooting
- Schedule absent: confirm you saved Schedule rather than Draft.
- Wrong time: compare the community timezone and the displayed schedule.
- Past time rejected: choose a future value.
- Pending after the due time: refresh and contact support if processing remains delayed; avoid repeatedly creating duplicates.