
Visibility controls discovery. Joining rules control membership. Feature switches control the tools members can use; these are separate decisions.
Before you start
Open Settings as a community manager. Check your slot and subscription before enabling paid or invite-only access.
Steps
1. Set visibility
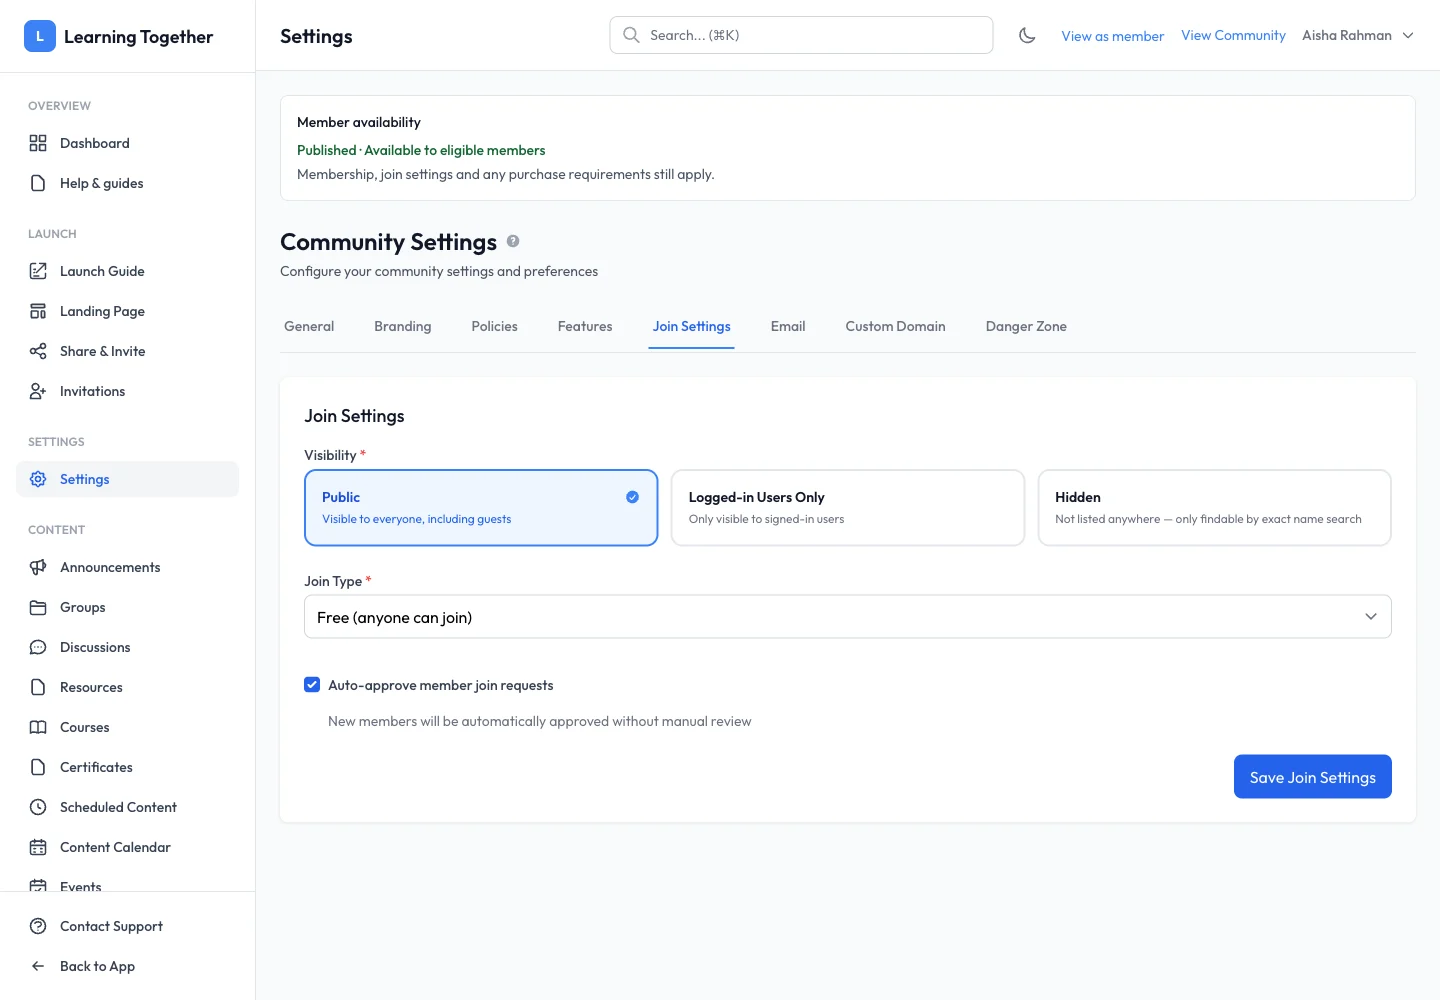
Open Settings → Join Settings. Choose Public, Logged-in Users Only or Hidden according to the discovery behaviour described on the screen. Hidden communities are not listed in the directory; share an appropriate invitation directly.
2. Choose the joining method
Set Join Type to Free, Paid or Invite Only where available. For paid joining, review the price and currency fields shown. Decide whether Auto-approve member join requests fits your community. Save with Save Join Settings.
3. Enable useful features
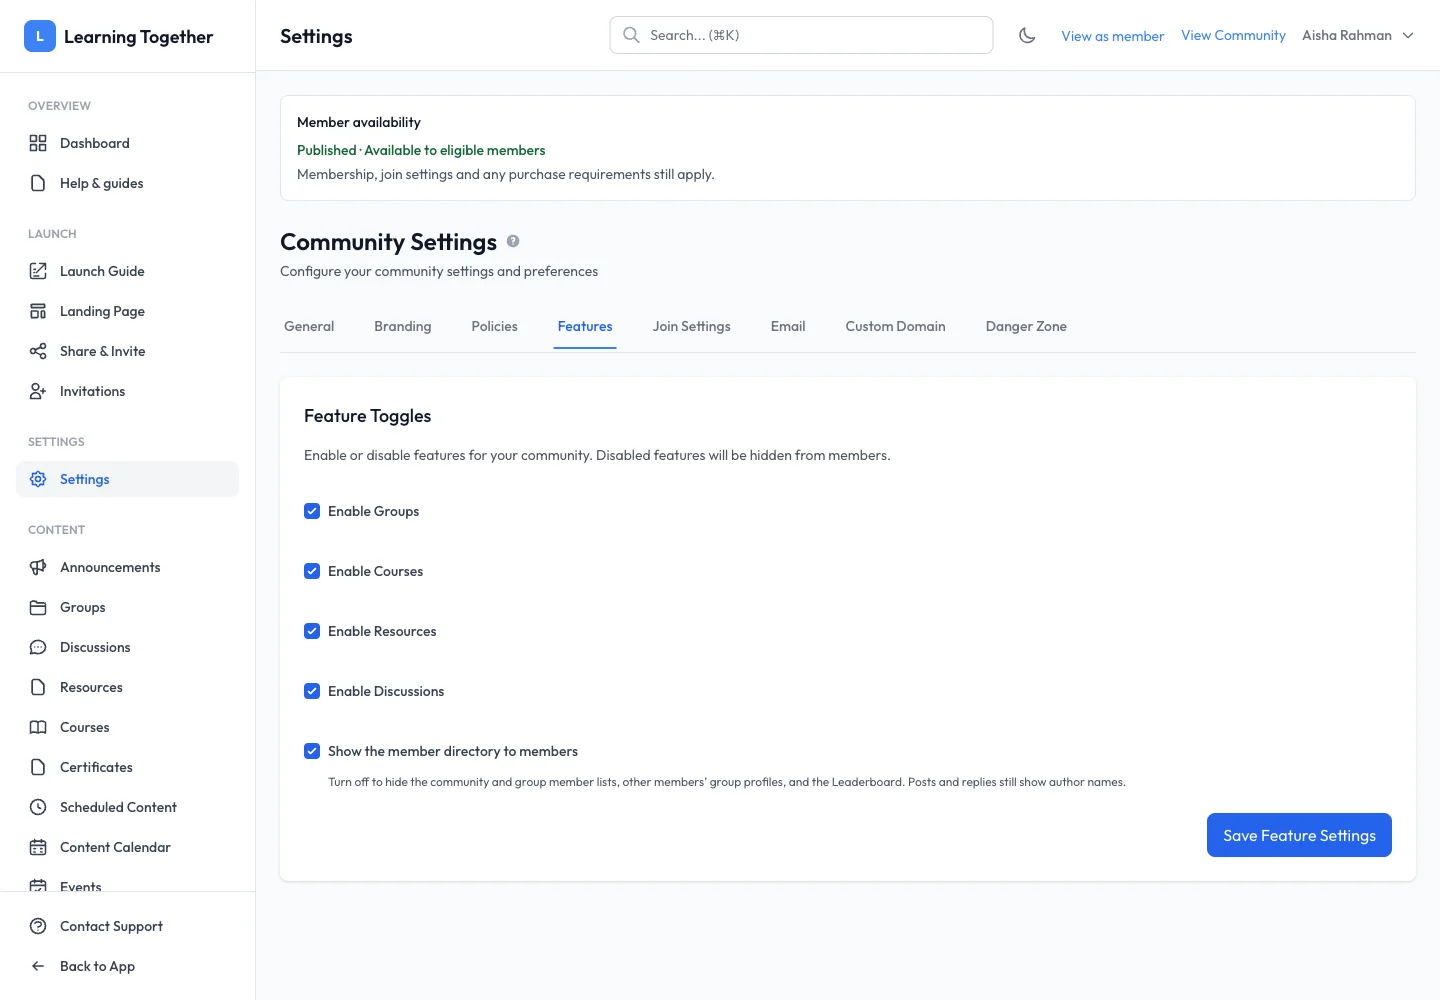
Open Features. Enable the tools you intend to maintain, such as Groups, Courses, Resources and Discussions. Avoid presenting an unused area as the starting point for new members. Select Save Feature Settings.
4. Decide whether to show members
Review Show member directory. Turning it off hides community and group member lists, other members’ group profiles and the Leaderboard. It does not remove author names from posts and replies. Explain this distinction to members asking about privacy.
5. Check access as a member
Use View as member and, where relevant, a signed-out browser to inspect the result. A manager’s ability to open a page does not prove that a new member can open it.
Expected result
Discovery, membership and enabled navigation reflect the choices you saved. Directory visibility follows the privacy setting.
Troubleshooting
- Members cannot find the community: review visibility and share a direct invitation if needed.
- People wait after joining: review the member status and auto-approval setting.
- Leaderboard missing: check both leaderboard and member-directory settings.
- A paid-only option is unavailable: review your slot and subscription entitlement.