Create a community when you want to bring people, content and learning together under one name. The slot you choose controls which features are available.
Before you start
Sign in and complete onboarding. Decide whether you need courses, paid access, private joining or email broadcasts. Review the current subscription allowances before choosing a paid slot.
Steps
1. Choose a slot
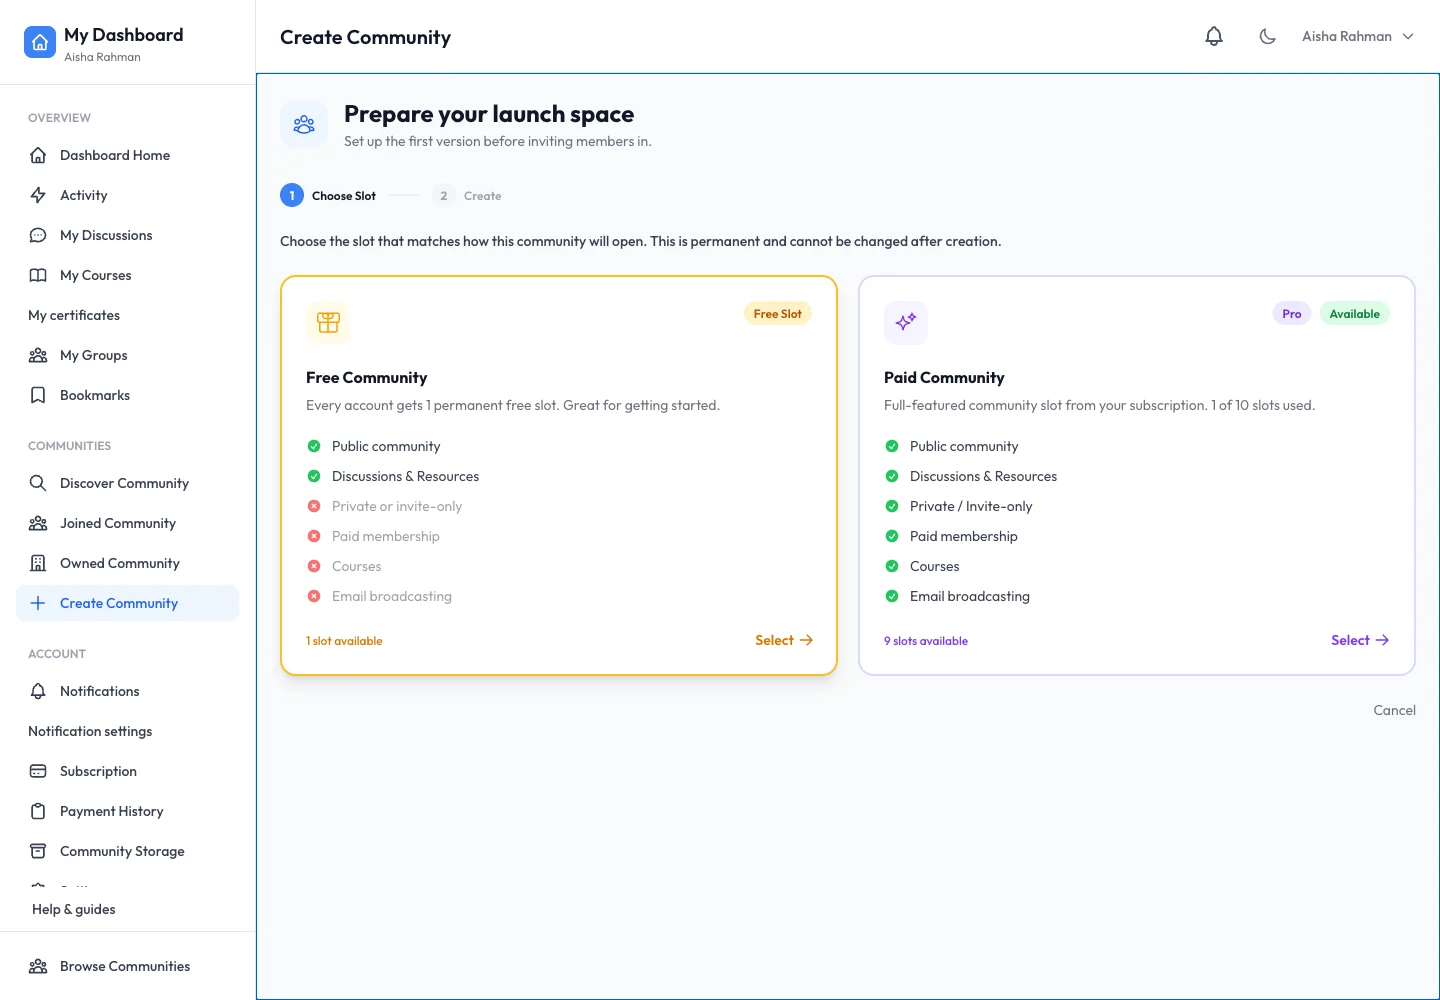
Open Create Community. The first step is Choose Slot. Read the Free Slot and Paid Slot descriptions, then choose Select on the appropriate option. Slot type is permanent after creation. A free slot supports a public community with discussions and resources; paid-only features need the appropriate slot and plan.
2. Enter the community basics
Continue to Create. Enter the community name and the other required details shown in the form. Choose a clear URL before creating: the community URL cannot be changed later in Settings. Write a description that explains who the community is for and what members should do first.
3. Prepare the space
Open the new community’s Launch Guide. Work through its preparation tasks: add a logo and welcome message, decide joining rules, create a group and add useful starting content. Keep unfinished courses and resources in Draft.
4. Check the member experience
Use View as member and follow the first actions you expect a new member to take. Confirm that a welcome update and useful content are available. Review the landing page separately before sharing its link.
5. Publish when ready
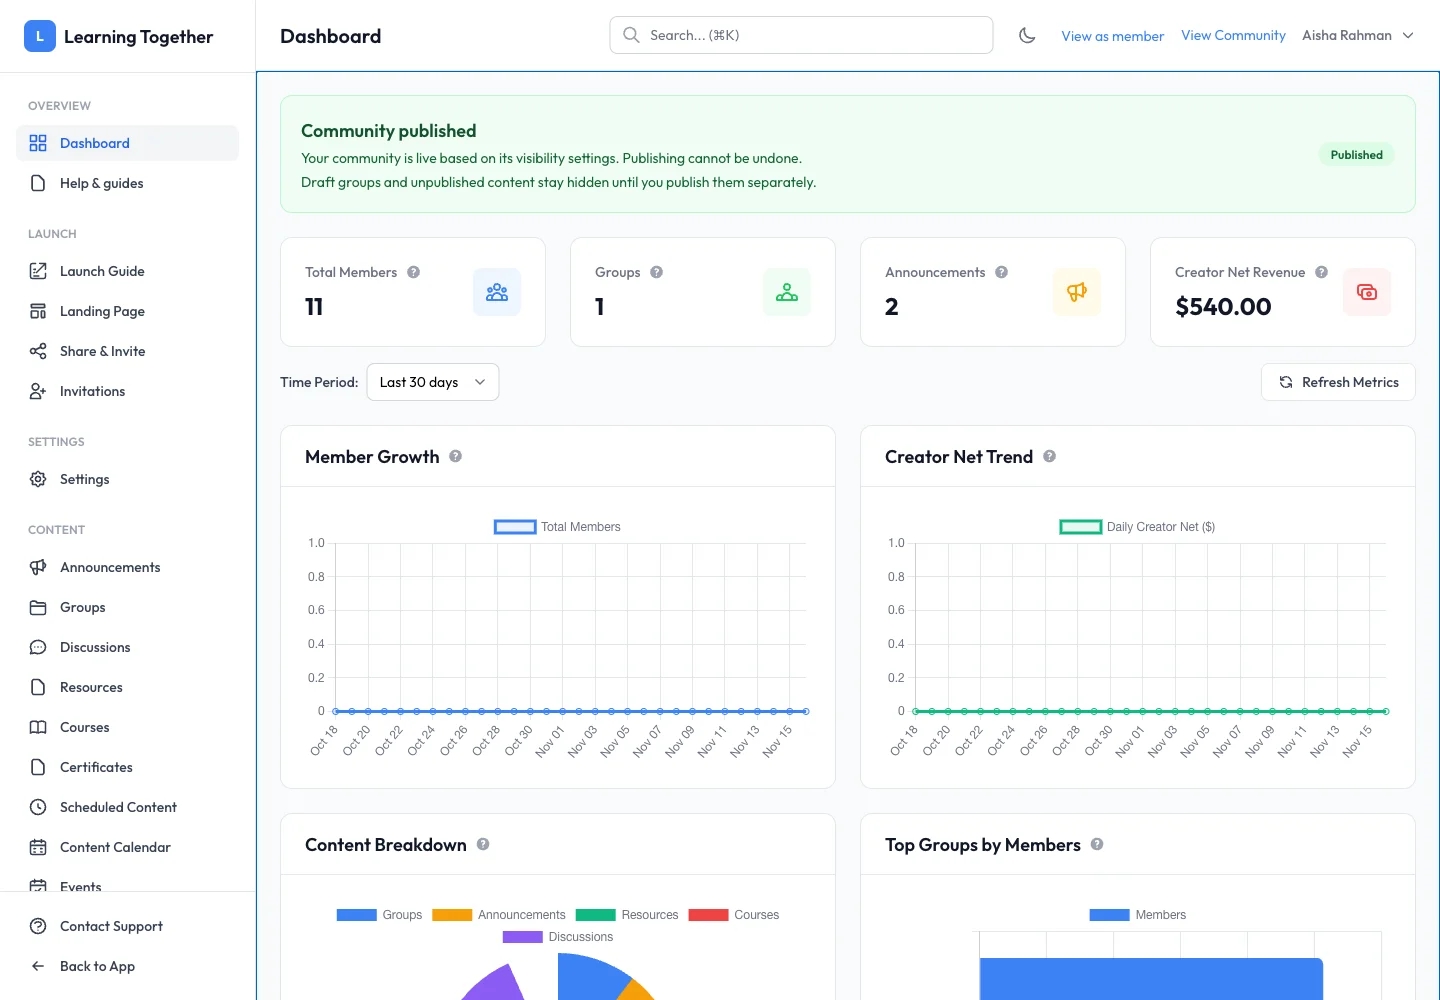
Return to Launch Guide and complete the publication confirmation. Publishing a community is permanent: it cannot return to preparation mode. Draft groups and unpublished content remain hidden until you publish those items separately.
Expected result
You have a named community with the correct slot, a clear starting point and deliberate publication status.
Troubleshooting
- No paid slot available: check subscription capacity or remove an unused slot only after reviewing its consequences.
- A feature is unavailable: check both slot/plan entitlement and the Features tab.
- Published community contains missing content: publishing the community does not publish every draft inside it.