
Your landing page introduces the community before someone joins. Use it to explain the audience, the value and the next action.
Before you start
Open community management with landing-page permission. Prepare your introduction, a clear joining link and images you have permission to use. A saved page can be visible on a published community, so review changes before saving.
Steps
1. Open the editor
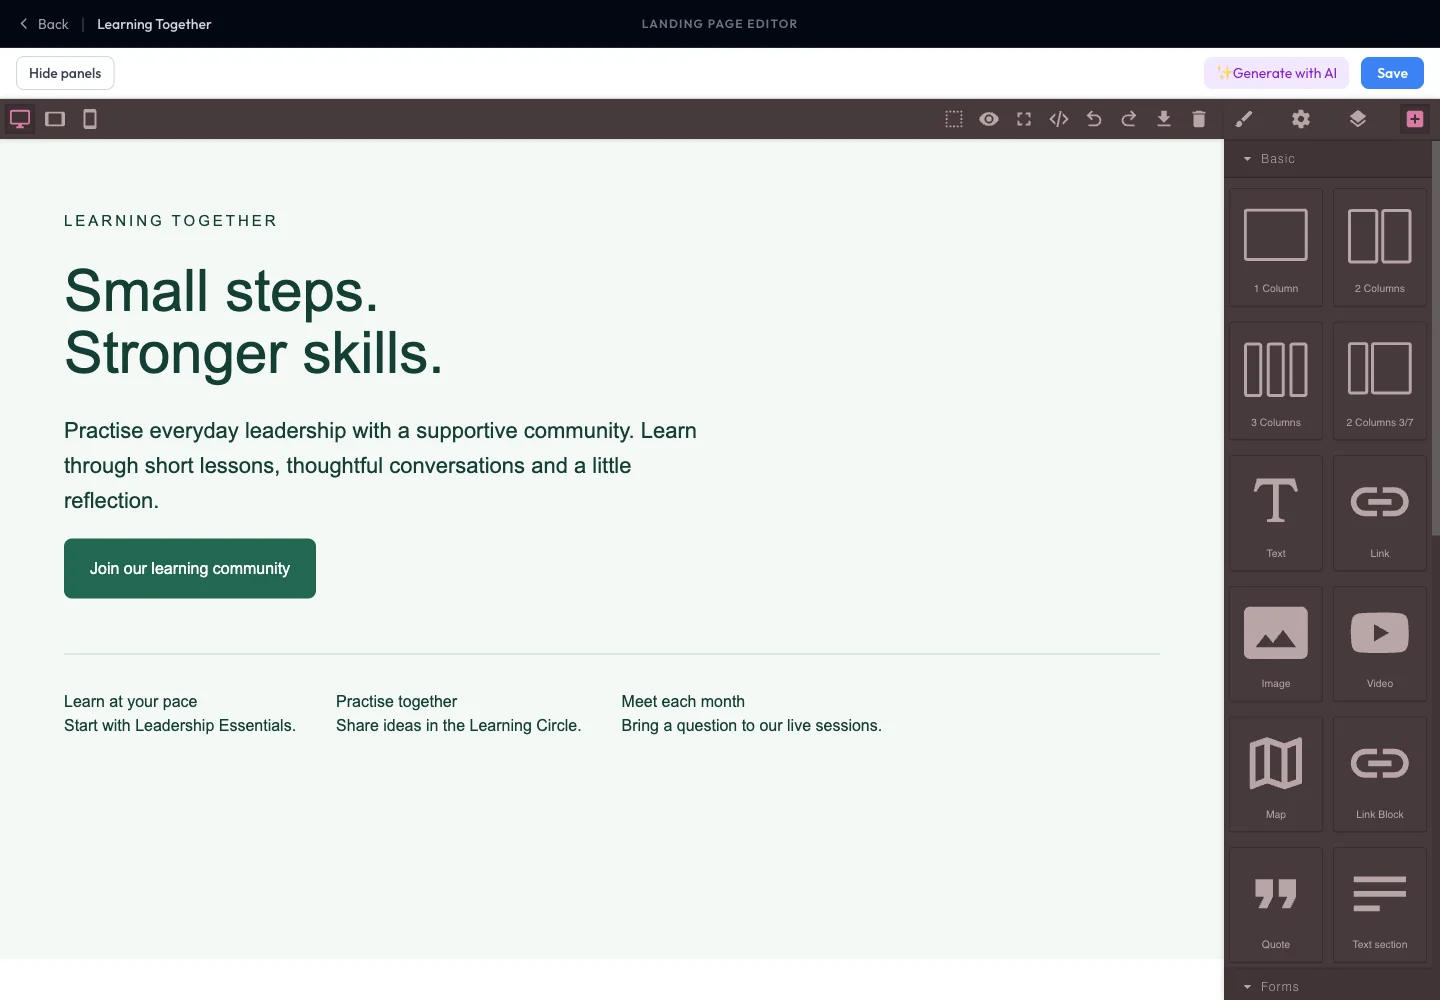
Choose Landing Page. The canvas shows the page; the block panel contains items such as Text, Image, Link and columns. The example page introduces Learning Together and its three main activities.
2. Edit the page content
Select the text you want to edit on the canvas and use its editing controls. Keep the headline short and the introduction specific. Select a link and inspect its destination before changing the label. For a joining button, use the actual joining destination for your community.
3. Add and arrange sections
Drag a block from the panel into the page. To change a photo, select the image once and choose Replace image in the sidebar. On a phone, the controls appear above the canvas. Upload a JPEG, PNG or WebP, paste an HTTPS image address, or choose an image already in your project. Use Alternative text to describe an image that conveys information. Leave it empty for a decorative image.
For a photo behind text, select the hero or section and choose Replace background image. The editor keeps the overlay and positioning. Check both desktop and phone previews after changing the photo.
To clear an unused upload, open Page images, select Remove beside the image, and save the page.
4. Preview different widths
Use the desktop, tablet and phone controls in the editor toolbar. Check that text remains readable, images fit and the joining action is easy to find. Hide panels gives the page more space while you inspect it; it does not publish anything.
5. Save and visit the page
Select Save. The Landing-page address next to Save shows when the page is ready. Choose Open to inspect it or Copy link to send it to a visitor. People can also choose Visit landing page on your public Circle community profile. Try the joining button while signed out to check the visitor experience.
A launched public community on a paid slot gets a Recqa address such as learning-club-circle.recqa.com. Recqa sets up the address after the first save or launch. Your saved design stays available in the editor while setup runs. If you connected a branded domain, the editor lists that address first.
For a hidden or logged-in-only community, the owner can turn on Make landing page public. Anyone with the address can then see the saved design. Put only material you want to share there. Membership and invitation rules still apply. Turn the setting off to withdraw the public design.
Expected result
The saved landing page presents your actual community offer and guides visitors to the correct next step.
Troubleshooting
- Page looks blank: add a section or generate a starting design, then save.
- Link goes to the wrong place: edit the destination as well as the visible text.
- Phone layout is crowded: shorten text, reduce columns and check the phone preview again.
- Changes disappeared: save before leaving the editor.