
An invitation can grant entry to the community or a particular group. Restrictions, expiry and payment bypass determine who can use it.
Before you start
Open community management with invitation permission. Decide the audience and whether the invitation should waive a joining charge. Only share invitations with people who should receive that access.
Steps
1. Create a code
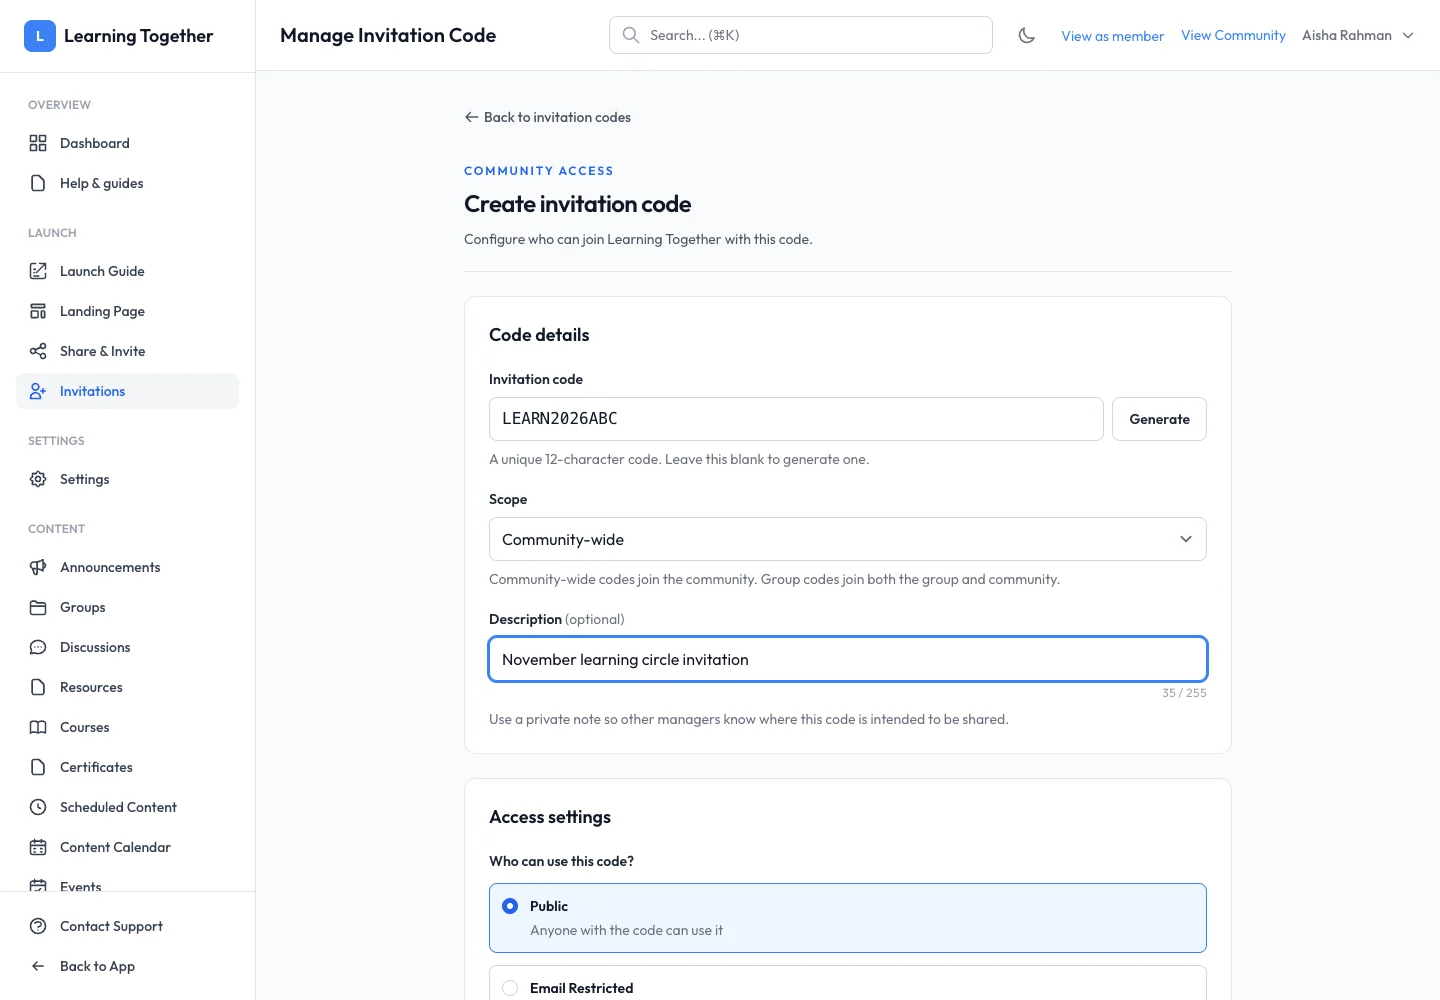
Open Invitations and choose the create action. Use Generate for a new code or enter a unique 12-character code using letters and numbers. Add a description such as “November learning circle invitation” so your team can recognise it later.
2. Choose scope and restrictions
Choose community-wide access or select a group. A group invitation joins the recipient to the community and the selected group. Select public, email-restricted or user-restricted access as appropriate. Check the invited email spelling carefully.
3. Set limits
Set Max Uses and an expiry when you want a limited offer. Blank values mean no limit or no expiry as described in the form. Review Bypass payment carefully: enabling it can grant free entry even when joining normally costs money. Keep the invitation Active only while it should be usable.
4. Create and share
Select Create code. Copy the generated invitation link or share the code with its joining instructions. Do not promise that a community invitation includes every separately sold course or resource.
5. Review usage
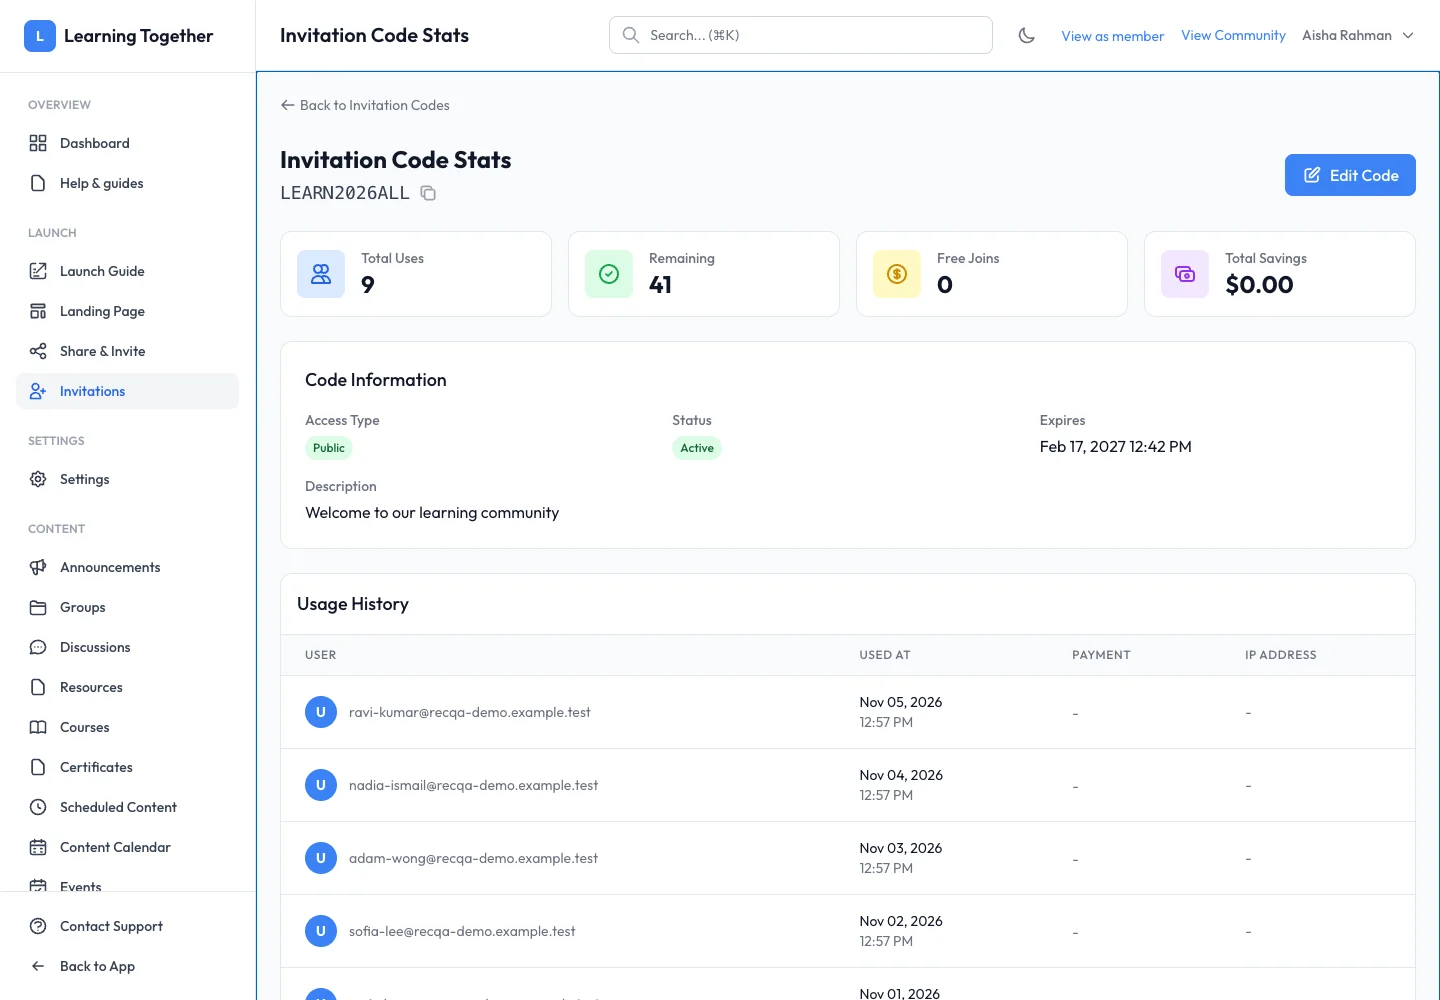
Open the code’s statistics to see total uses, remaining uses and history. Edit or deactivate the code when the invitation period ends.
Expected result
The code appears in your invitation list with the intended restrictions and limits. Eligible recipients can redeem it while it remains valid.
Troubleshooting
- Recipient is rejected: check the allowed email/user, active state, expiry and remaining uses.
- Code already exists: generate another unique code.
- Unexpected free access: inspect the payment-bypass choice.
- Wrong group: verify the scope before sending a replacement invitation.