
Events bring members together for a live session, meetup or call. An event’s RSVP list is separate from training certificate attendance.
Before you start
Have an event title, start/end time, timezone and location or meeting details. Decide whether capacity is limited.
Steps
1. Open Events
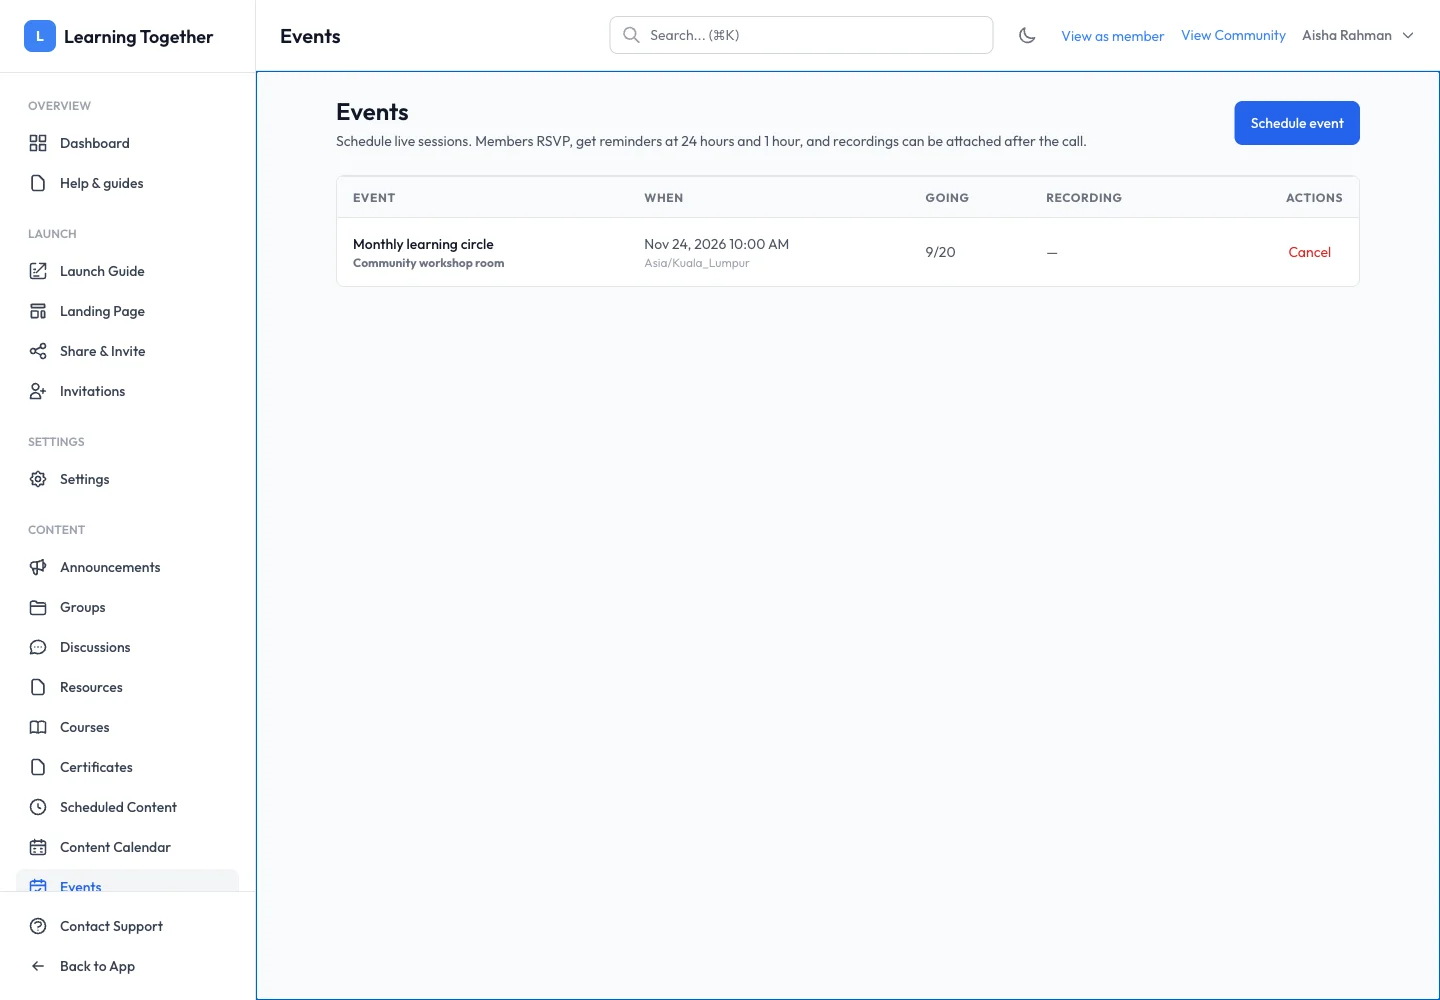
In community management, choose Events → Schedule event. Enter a clear title and description explaining what members should prepare.
2. Set time and location
Enter the start and end, confirm the timezone and add the venue or supported meeting details. Set capacity if attendance is limited. Save the event and inspect its scheduled row.
3. Check the member view
Use View as member and open Events. Confirm the title, displayed timezone and location. Members can choose Going, Interested or Not going. Reminder delivery depends on their notification preferences and the platform’s delivery configuration.
4. Update the event outcome
Use the event’s available controls to update details or attach a recording after the call. Check that the recording opens for its intended audience. If cancelling, read the confirmation and communicate the change clearly to attendees.
Expected result
Members can see the event, understand when and where it happens and record their RSVP. A recording can be made available after the session.
Troubleshooting
- Unexpected local time: verify the event timezone, not only your computer clock.
- Capacity reached: review the event’s limit before offering more places.
- Reminder missing: check the member’s Event Reminders preference and delivery status.
- Certificate needed: create a training session and confirm attendance separately; RSVP alone does not issue a certificate.