
Certificate templates contain editable text, layout and branding. Recqa supplies sample recipient and training details while you design. An issued certificate replaces those examples with the real participant’s information.
Before you start
Open community management with certificate-management permission. Prepare a PNG or JPEG logo up to 2 MB, no larger than 4096 pixels on either side and no more than 8 million pixels in total (width × height). AI generation requires the platform team to enable and configure the Certificate Template AI module; its provider and model are separate from landing-page generation.
Steps
1. Start from a template
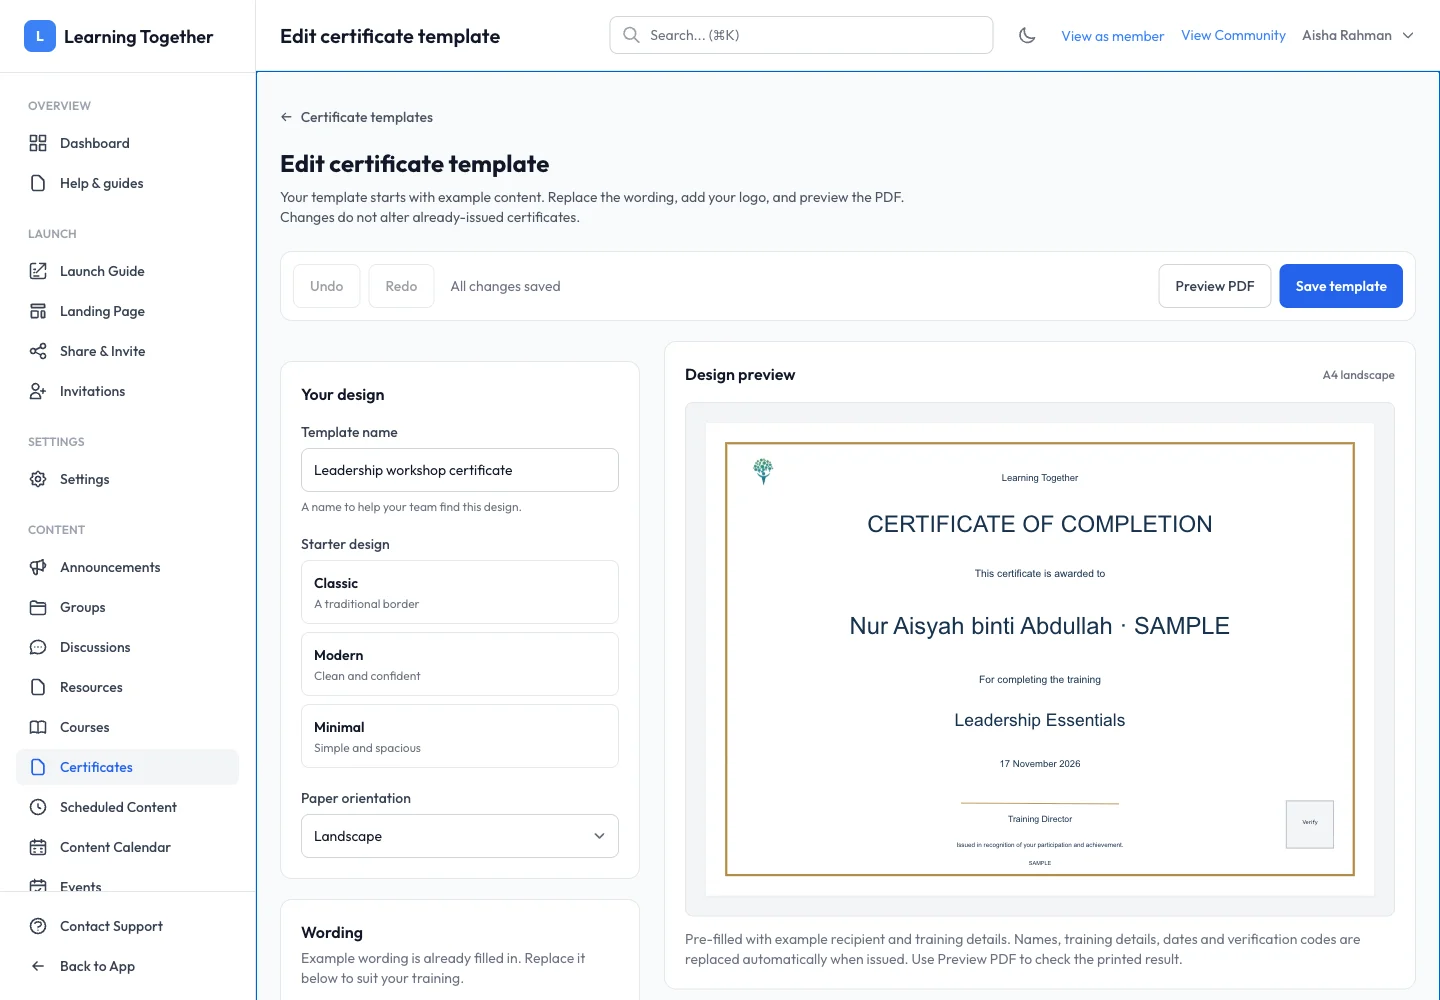
Open Certificates → Templates and create a template. Give it a name your team will recognize. Choose Classic, Modern or Minimal as a starting point.
The example content is already filled in. Read it and replace the wording you want to change; you do not need to design from a blank page.
2. Add your logo and wording
Upload your logo using the editor’s logo control. Change the heading, introduction and other wording in the relevant fields. Check that the logo is readable and does not overlap the participant’s name.
Keep linked fields for the recipient, training, date and verification information. These fields are populated when the certificate is issued; typing a participant’s name into a fixed heading would make it appear on everyone’s certificate.
3. Optionally generate a design with AI
Describe the desired style and content in the AI instruction field. For example: “A landscape leadership certificate with a navy border, teal accents and space for the logo.” Generate a proposal and review it before choosing Apply changes.
Wait until the proposal has been applied before editing again. The proposal remains editable: adjust its text, colors, layout or logo size manually. Undo and Redo let you compare changes.
4. Preview the PDF
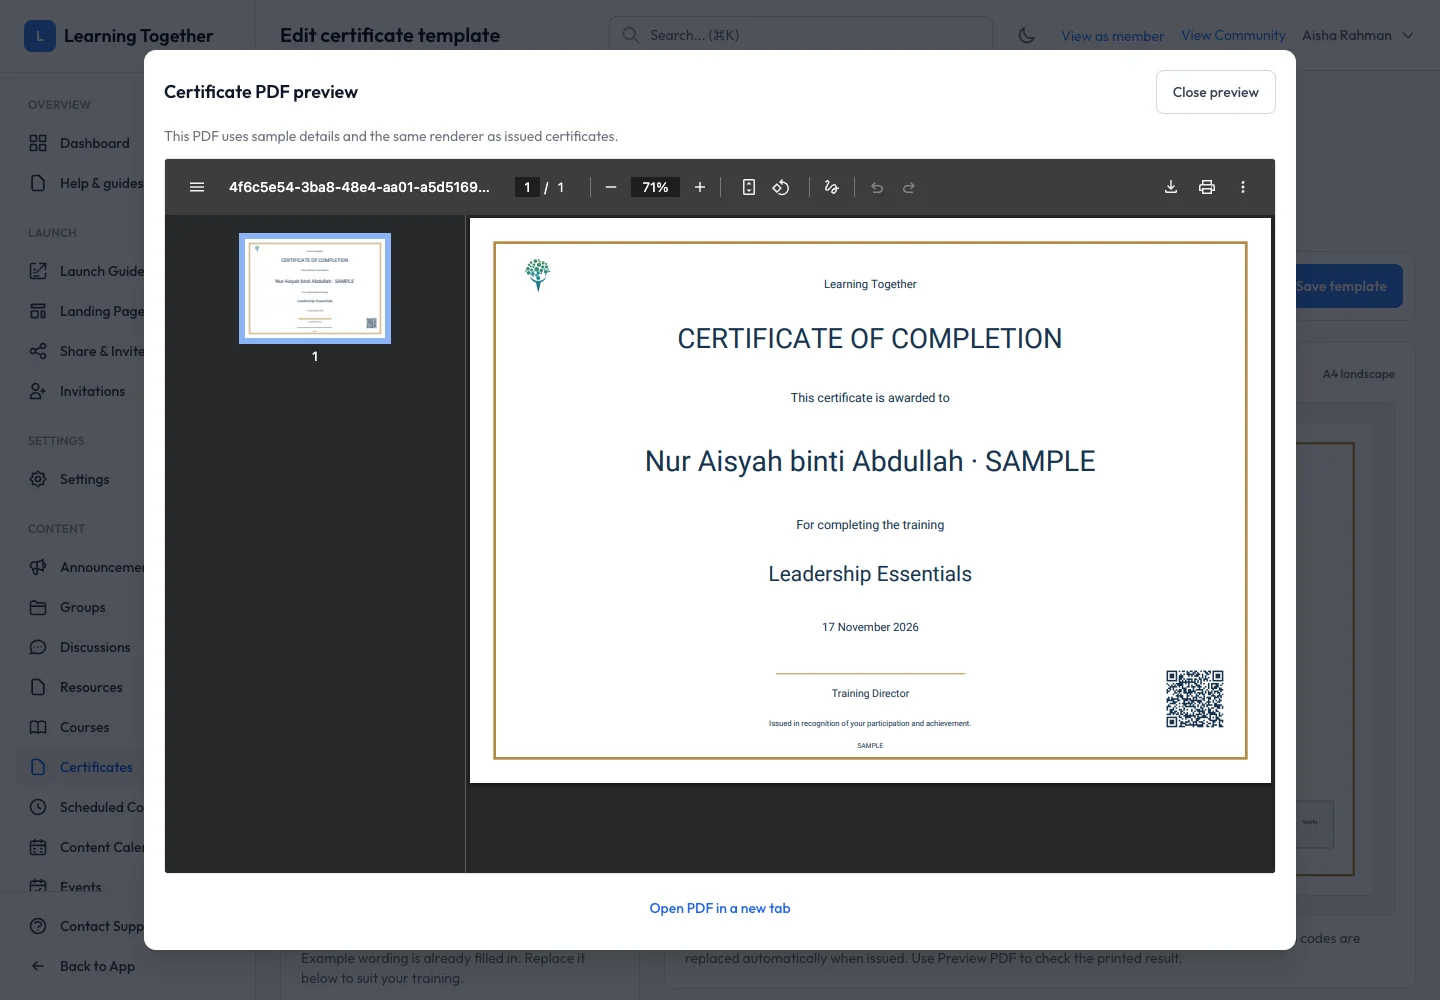
Select Preview PDF. Check the heading, sample long name, logo, date, signatory and verification area. The preview contains sample details; it is not an issued certificate.
5. Save and reopen
Select Save template, return to the template list and reopen it. Confirm that your wording and logo remain. Select the template in the training session that will issue it.
Expected result
A saved, reusable template with your wording and logo, editable even after AI generation. Issued certificates use real participant and session details in the linked fields.
Troubleshooting
- AI unavailable: ask the platform team to review the certificate module’s enabled state, provider and model. You can still edit a starter manually.
- AI response did not apply: read the editor message. If you changed the draft while generation was running, review the latest draft before generating again.
- Logo looks stretched: adjust its dimensions to preserve the image’s proportions and check the PDF.
- A sample name appears in the preview: this is expected. Check an issued certificate when validating real participant data.