
Use media when it helps the learner understand or practise. Add a descriptive title and, for audio, a transcript when available.
Before you start
Open the target section in a course curriculum. Prepare supported files or accessible source links and check your upload allowance.
Steps
1. Add video
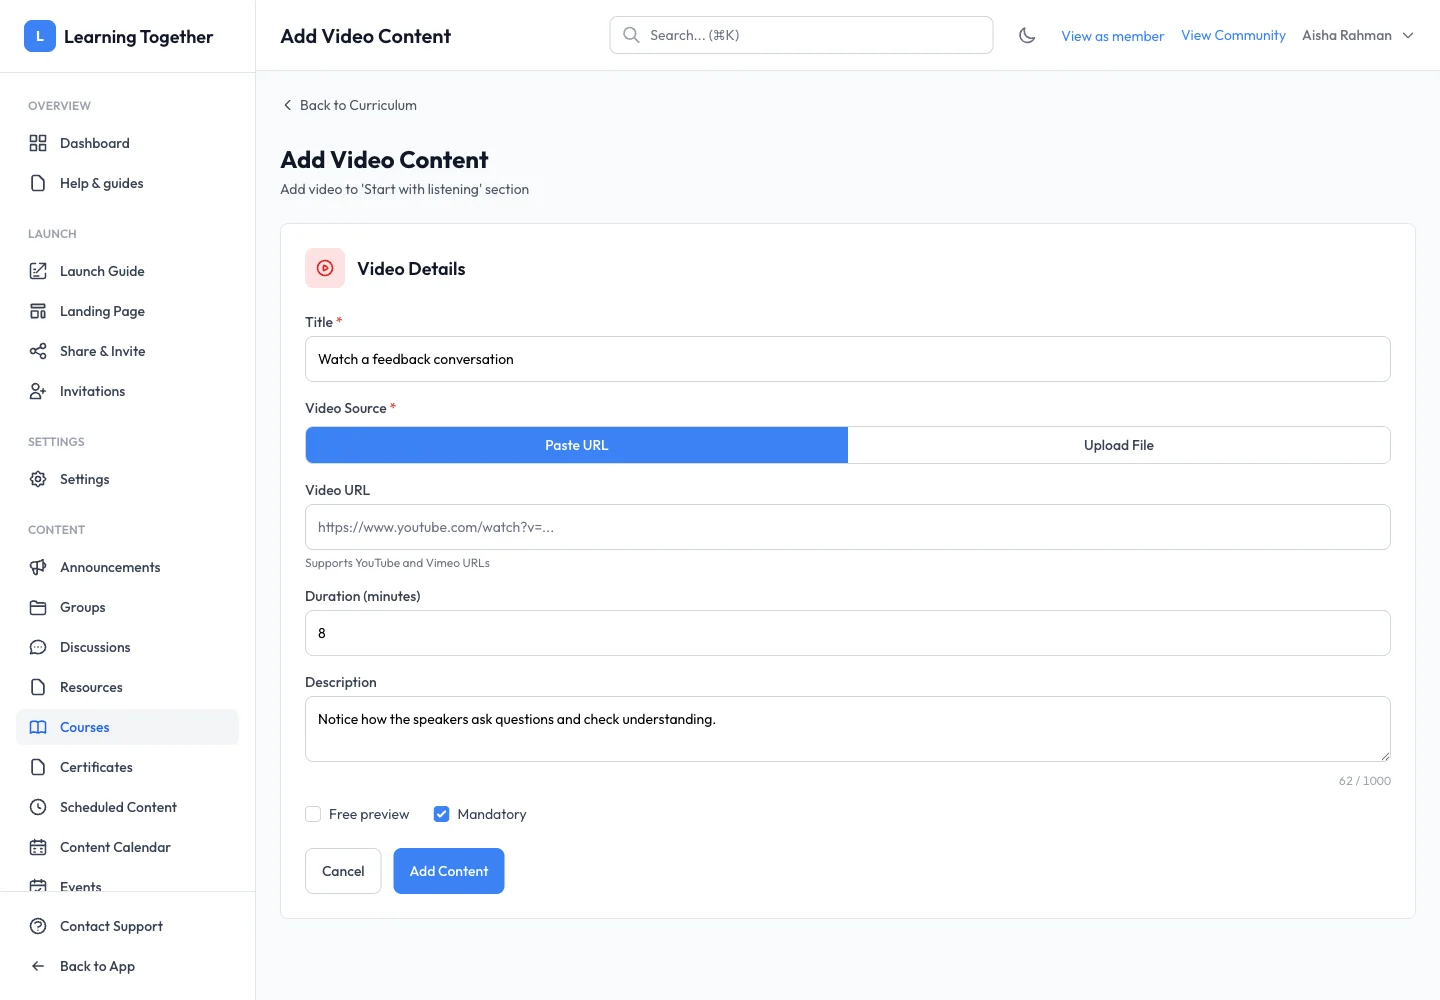
Choose video content. Enter a title and choose Paste URL or Upload File. The URL option supports YouTube and Vimeo links. For an upload, use the file limits shown by the form and wait for completion. Set duration, description, Free preview and Mandatory, then Add Content.
2. Add audio
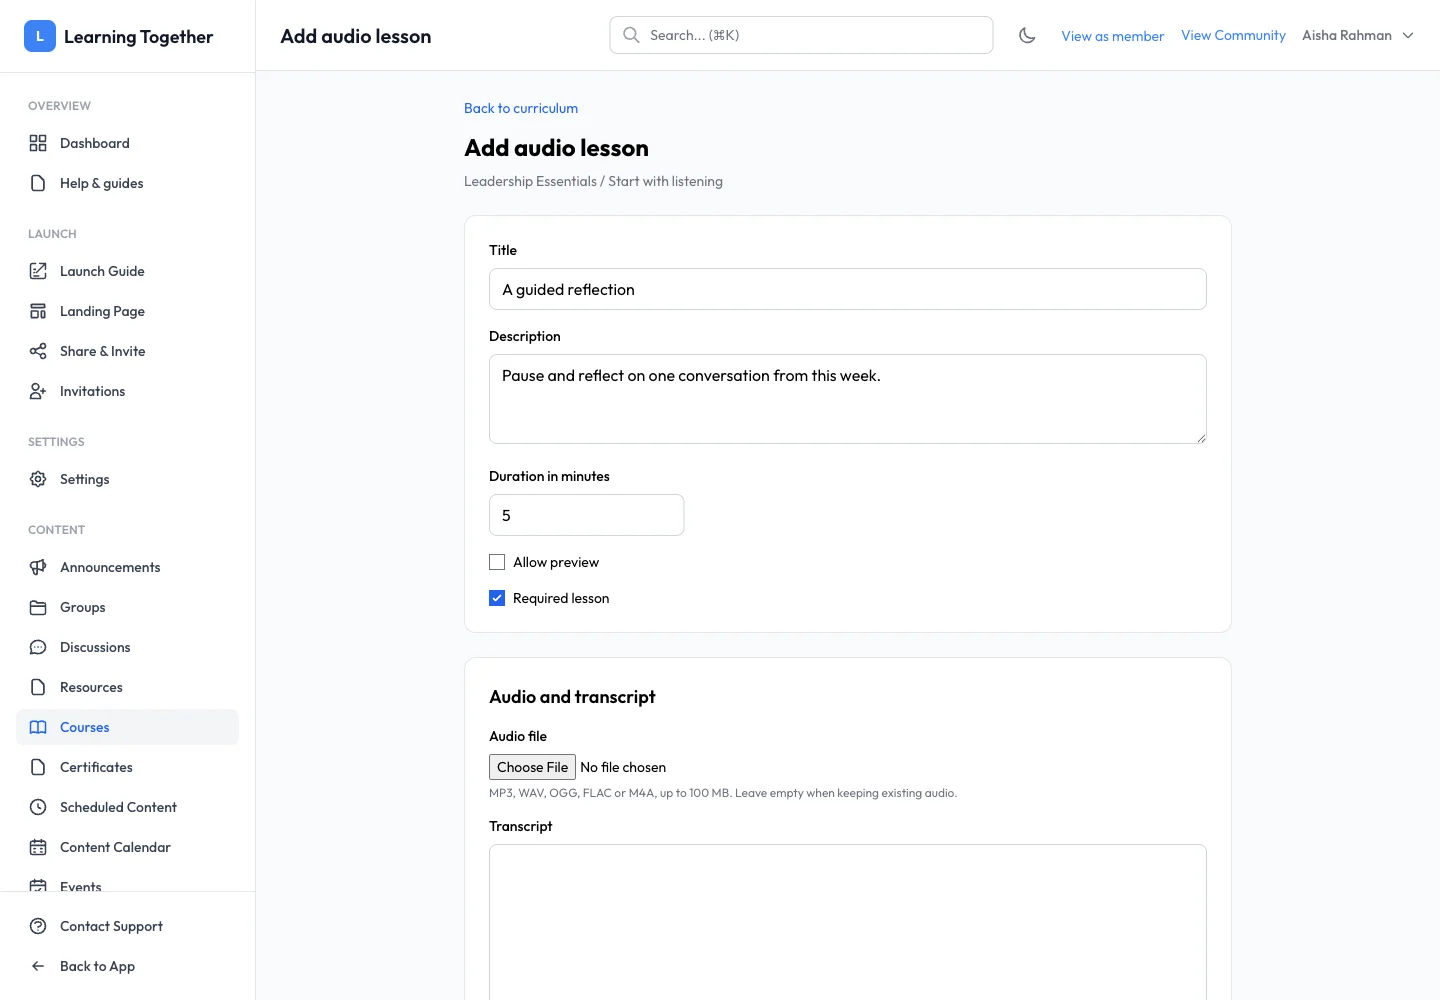
Choose an audio lesson. Enter title, description and duration, then upload the audio. The form accepts MP3, WAV, OGG, FLAC or M4A up to 100 MB. Add a transcript. If the recording uses an AI-generated standard voice, enable that disclosure so it appears beside the player. Set preview and required-lesson choices, then Save audio lesson.
3. Add a document
Choose document content and select Upload File or External URL. The upload form lists PDF, Word, Excel, PowerPoint, ZIP, TXT and CSV with a 50 MB maximum. Add a clear title, description and reading duration. Set whether it is mandatory, then Add Content.
4. Test the saved media
Open the course player as an eligible learner. Play the video or audio, inspect the transcript and download the document. A saved URL is useful only if learners can access its destination.
Expected result
The lesson’s player or download works and learners understand how the media supports the course.
Troubleshooting
- External video is blocked: check that its source allows viewing and embedding.
- Upload fails: check file type, per-file size and owner storage.
- Audio transcript missing: save the transcript with the lesson; a file upload alone does not write one.
- Document requires another login: adjust the source’s sharing permissions or upload an allowed copy.